Table of Contents
Buyer Product Validation Guide
What Is Buyer Product Validation?
Buyer Product Validation is a Buyer feature that involves creating rulesets that validate whether a Seller's product data is complete enough for a Buyer to list their products for sale.
Why Use Buyer Product Validation?
Buyer Product Validation enables Buyers to onboard their Sellers faster and with less effort. The Buyer's data requirements are recorded in Convictional as "validations". These validations apply to all Sellers that a Buyer wishes to onboard and guides Sellers on how to ensure their product data is ready for the product to be sold.
This means that a Buyer's internal teams need to spend less time updating missing product data. For example, it could mean fewer email threads stating that your particular business requires specific barcodes or that each product requires an image.
How Does Buyer Product Validation Work In Convictional?
Once a rule set is created, see 'How to create Buyer Product Validation rules' below, those rules will be applied against a Seller's product. When viewing an individual product, if the product fails any of the set rules, a warning will appear on the page indicting which fields are invalid.
Example: Product Validation rule requires that each product have an image. Here we have a seller whose product does not have an image. Notice the warning at the top of the page as well as inlined in the images section to help associate the errors with the properties that need updating.
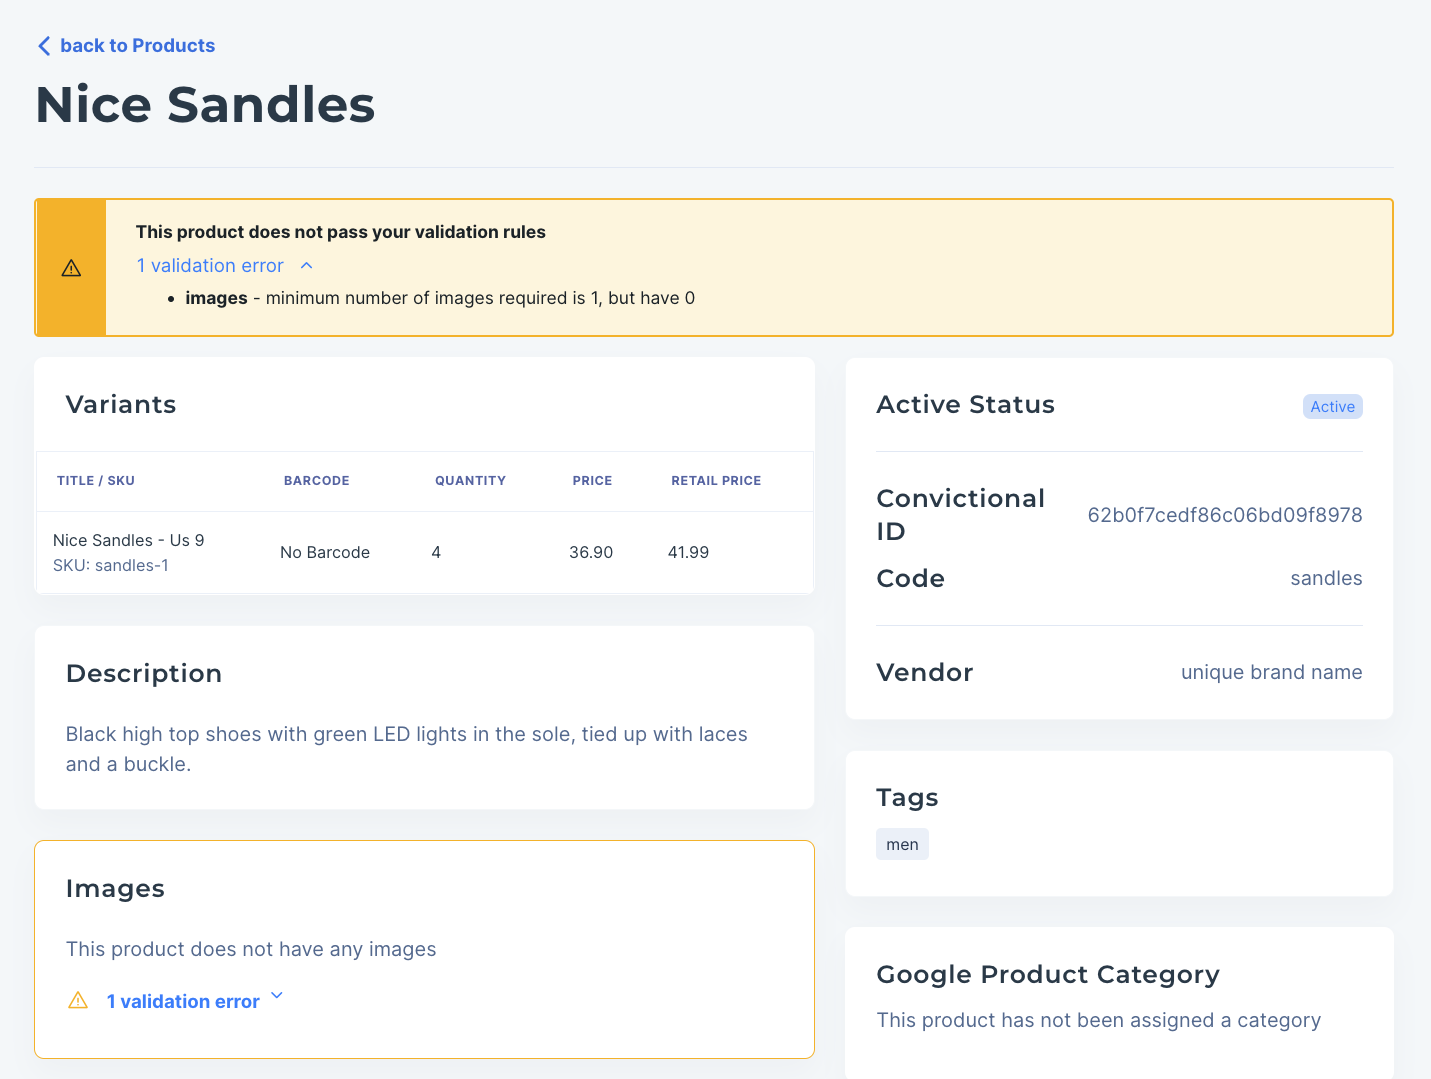
Note that the validation errors that appear currently only act as a warning. Both Buyer and Seller will be able to see the validation errors associated with a product. This provides the information needed to quickly fix product data. A Buyer can still choose to select and sync products even if they fail certain validation rules.
How To Create Product Validation Rules
Word of advice
Before diving into how to create Buyer Product Validation, we want to highlight that although this is a useful and powerful feature, it should be used only as necessary. Your Seller partners will have validation error warnings appear on their product page anytime their products fail your validation rules. As such, we recommend to only set up validation rules that are crucial for you to begin syncing a product into your system.
Good example of Buyer Product Validation rules.
- Products must have images
- Products must use UPC for barcode type
- Products must have barcodes
- Google Product Category must be assigned
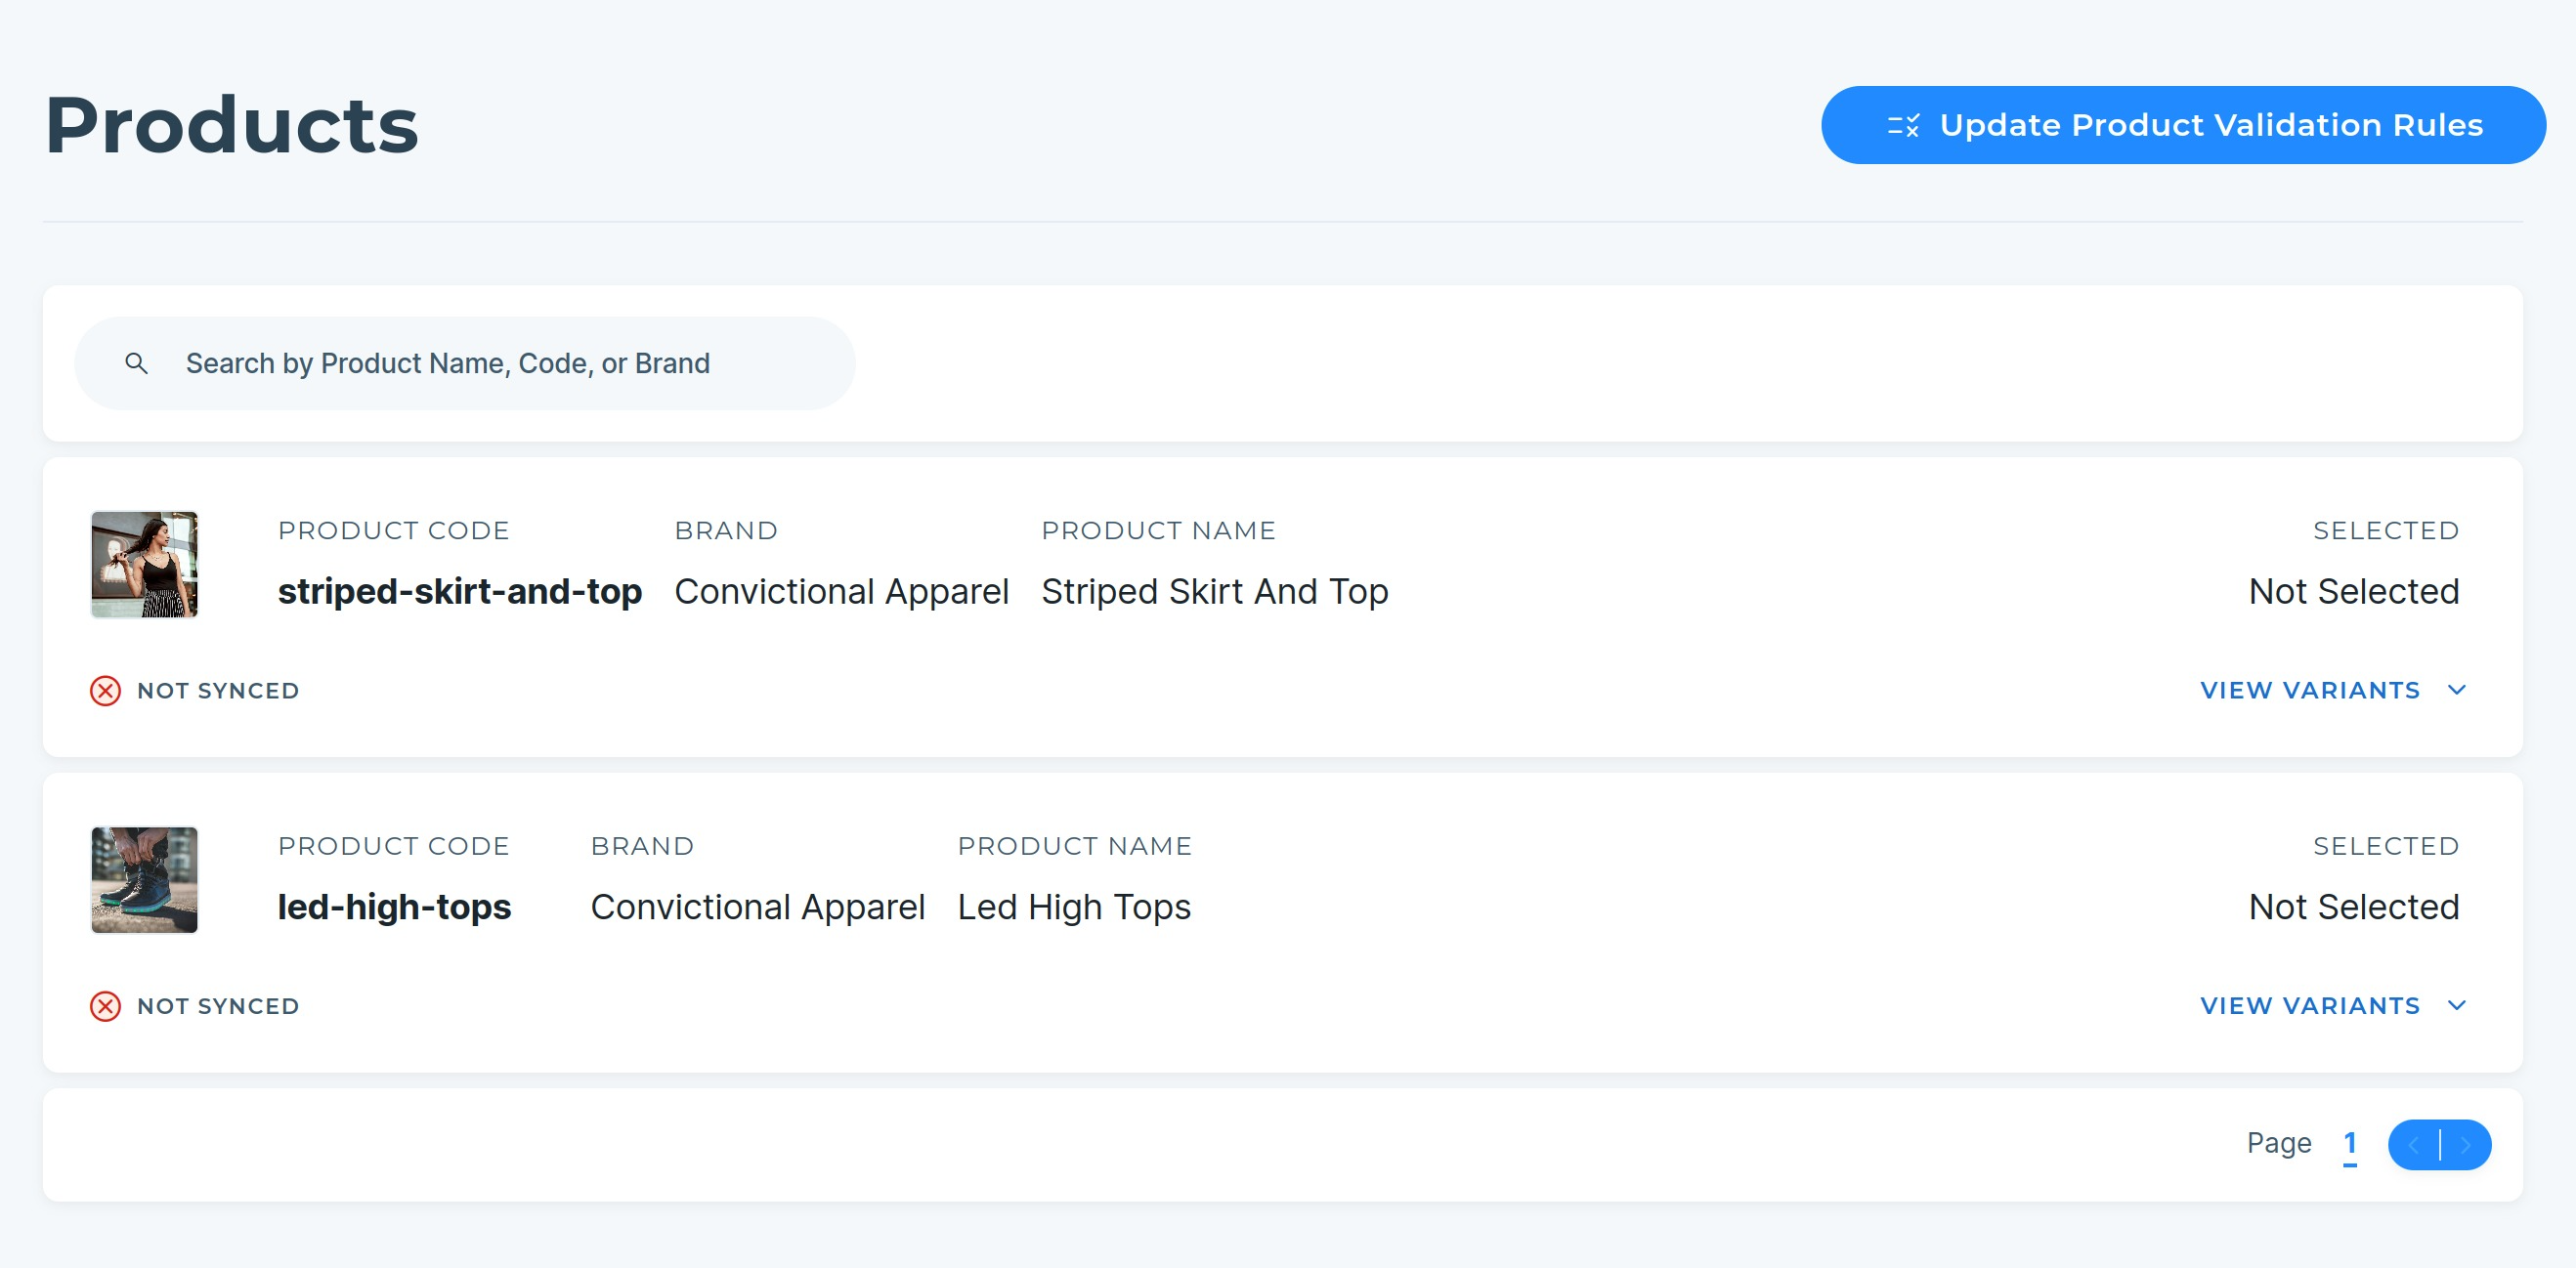
Step 1: Access the Buyer Product Validation setup tool
After logging into the Convictional platform, head over to the products page. There should now be a button on the screen that indicates to set up Product Validation rules. Click the "Update Product Validation Rules" button to open the setup tool.
Step 2: Add General Requirement Rules
Once the setup tool is active, you can begin setting up rules. Let's start with the top portion named 'General Product Requirements'. This section includes checkboxes for a number of product related properties. If a value is required for a property, check the associated checkbox. If you need to set barcode types, dimension or weight units, use the dropdown selector and choose the types you require.
Example: I require product title, description, images, Google Product Category, barcodes, barcode type and specially I need UPC for my barcode type. Here's how this would look in the Product Validation setup tool.

Step 3: Add Advanced Rules
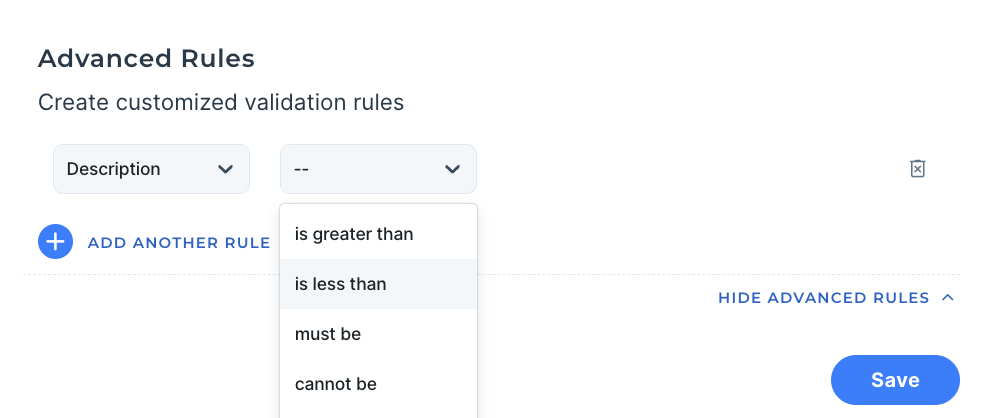
The advanced rules are located underneath the 'General Product Requirements' section. Advanced rules are meant to capture validations that are specific to your business. Each field has a specific set of validations that can be applied, see below for all available validations. In most cases, for advanced rules you will need to specify a field, a validation type and finally a condition. Let's walk through this one by one.
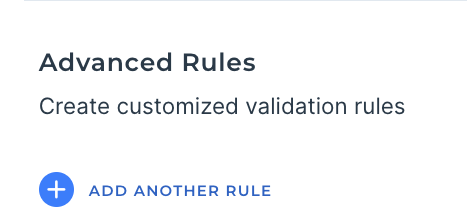
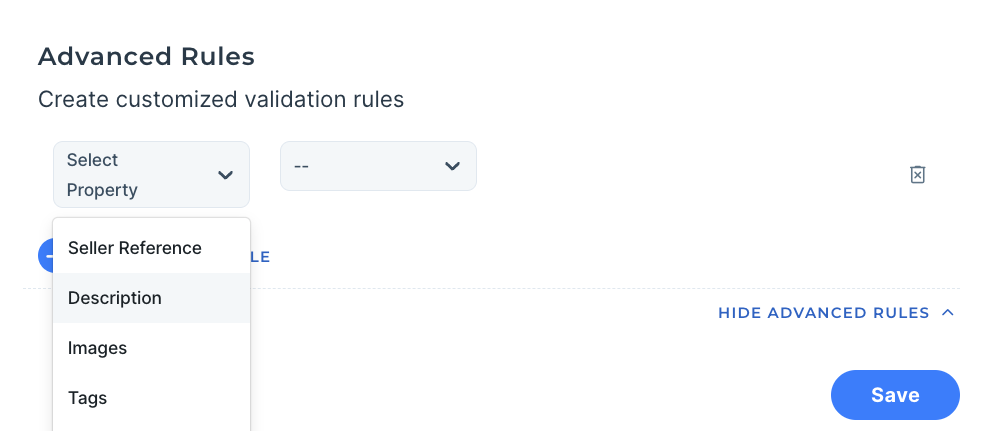
Start by clicking on the 'add another rule' button. This will generate a row with drop-downs to set up an advanced rule.
In the first drop-down, select the field for which the validation rules are to be applied. For example, if I want to add extra validation rules for description, I would find and click on 'Description'.
Next, in the second drop-down, I will select the validation I wish to apply for this field. In this case, let's say my system can only handle descriptions up to 100 characters. I will select 'is less than' as my validation since descriptions need to be less than 100 characters.
Finally, I will add in the validation condition in the third input box. Continuing off of the example of descriptions needing to be less than 100 characters, I will type in 100.
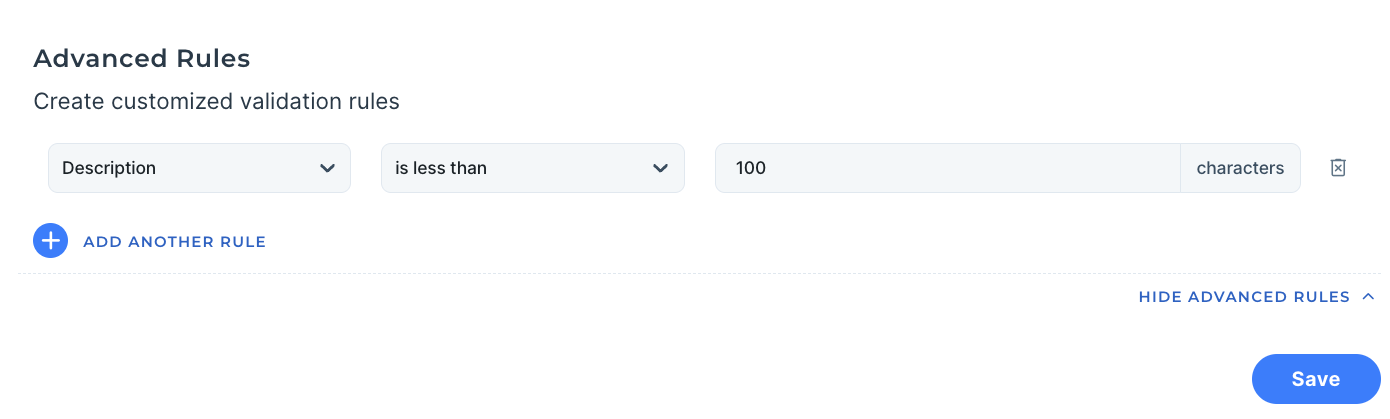
Once all 3 columns have been filled, the advanced rule is complete.
Note: You are allowed to input as many advanced rules as required. Again, remember to keep your validation rules at a minimum.
Step 4: Submit Rules
Once both general and advanced rules have been set up, simply click 'Save' and your Product Validation Rules will be instantly generated. You will be able to check for validation errors on products right away!
How To Update Buyer Product Validation Rules
Updating Buyer Product Validation Rules is nearly identical to the creation process. Simply click on the Buyer Product Validation set up tool and perform similar steps as outlined above. The main difference will be that the setup tool will already be populated with the validation rules associated with your existing Buyer Product Validation rules. Add, update or delete any of the rules in the setup tool until your rules satisfy your system's requirements.
Available Advanced Rule Validations
The following table contains the list of advanced validation rules that can be applied along with their intended use case.
Validation Rule | Intended Use Case |
Greater Than | Numeric values: For numeric fields such as inventory amount, the 'greater than' validation rule validates that a value must be larger than the 'greater than' condition. Text values: For text fields such as description, the 'greater than' validation rule validates that the number of characters in the text is larger than the 'greater than' condition. Images: For images, the 'greater than' validation rule validates that the number of images present on the product is larger than the 'greater than' condition. |
Less Than | Numeric values: For numeric fields such as inventory amount, the 'less than' validation rule validates that a value must be smaller than the 'less than' condition. Text values: For text fields, the 'less than' validation rule validates that the number of characters in the text is smaller than the 'less than' condition. Images: For images, the 'less than' validation rule validates that the number of images present on the product is smaller than the 'less than' condition. |
Must Be | Validates that a field's value be a specified value. Note: This rule should only be set once for a particular field. If there are multiple acceptable conditions, use the 'One Of' validation rule instead. |
Cannot be | Validates that a field's value is not a specific value. Note: This rule can be set multiple times for a particular field. 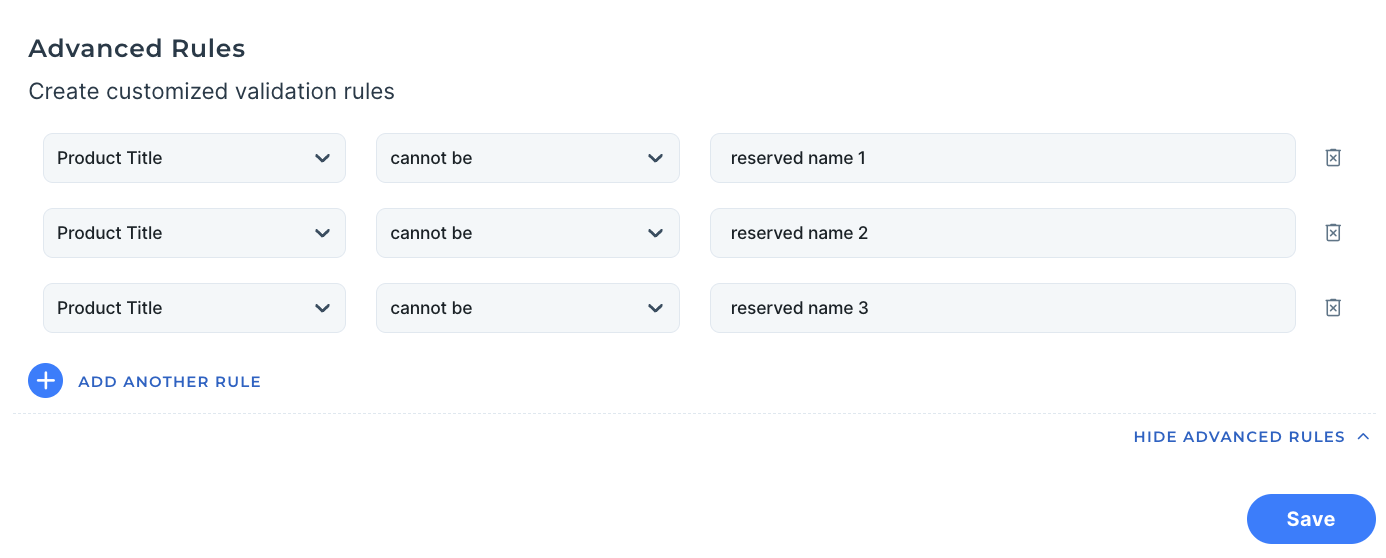 |
One Of | Validates that a field's value is one of a specified set of values. Note: When inputting the potential values, make sure to separate them by comma. For example, if I want to accept the colours red, blue and green I will input them as follows:  |
Unique | Requires that a field be unique against other products owned by a seller. Note: This validation rule is only applicable for SKU and Barcode. Additionally, no input condition is required. 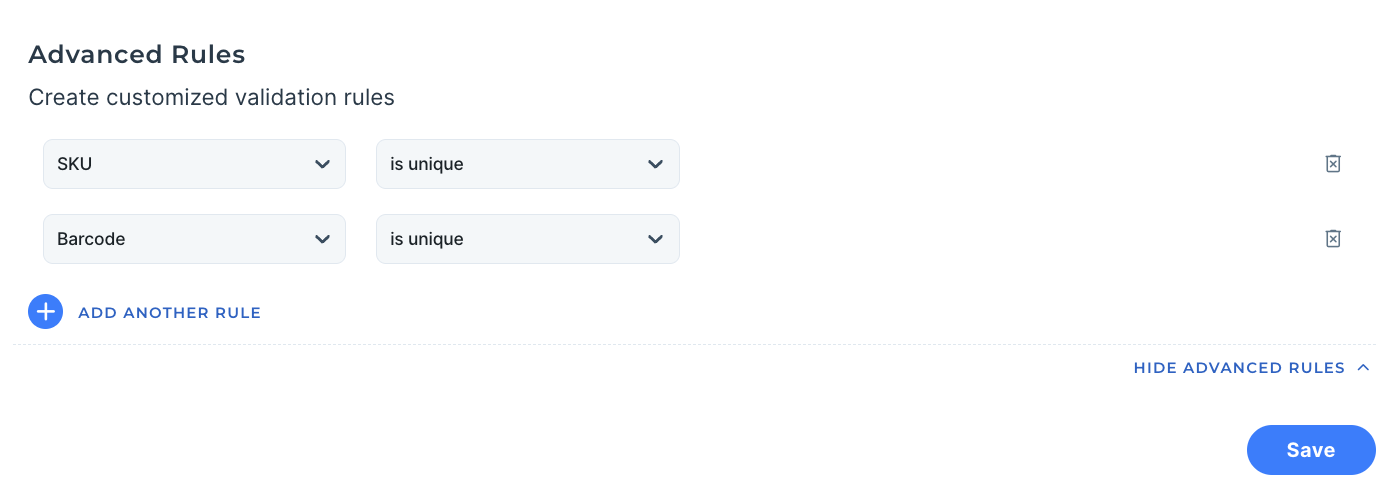 |