Getting Started on Convictional
Chat
Passwordless Sign-in
Single Sign-On (SSO)
Step by Step for Buyer Onboarding
Step by Step for Seller Onboarding
Successful Support Interactions
Integrations
Shopify
WooCommerce
Adding Barcode Values in WooCommerce
Connecting WooCommerce
How can I confirm that Convictional can pull my Products from my WooCommerce Store?
Updating your WooCommerce URL
Magento 2
BigCommerce
CSV managed account
Connecting through SFTP
Downloadable Image Links
Fixing SKUs in Scientific Notation
How to Resolve " Your SFTP user requires delete permission on your SFTP server."
How to Resolve "Unable to access your SFTP server"
How to Resolve "Your SFTP user requires read permission on your SFTP server"
How to Resolve "Your SFTP user requires write permission on your SFTP server."
Importing Products
Manual Fulfillment
API
Building API Integrations
Getting Started with Webhooks
Getting Started with the Buyer API
How to Create an Order for the Buyer API
Webhook FAQ
EDI
Connecting through Seller EDI - Invoice (810) Specification
Connecting through Seller EDI for Dropship
Connecting through Seller EDI for Dropship - Advance Ship Notice (856) Specification
Connecting through Seller EDI for Dropship - Inventory Update (846) Specification
Connecting through Seller EDI for Dropship - Purchase Order (850) Specification
Connecting through Seller EDI for Dropship - Purchase Order Acknowledgements (855) Specification
Downloading EDI Files
How to Create a Test Order as an EDI Seller
How to Resend an Advance Ship Notice
How to Resolve "Already Processed Files"
Seller EDI Quick Reference
Migrating Ecommerce Platforms
Supported Connection Methods
Account Management
Connecting Easypost
How to Change Your Commerce Type
Integrating your CRM
Inviting Team Members
Managing Issues
Managing Multiple Accounts
Managing Notifications
Setting Billing Address
Viewing Subscription Info
Partners
Actions & Action Templates
Adding Partners
How to Determine the Remaining onboarding steps for a Partner
Seller SLAs
Products
Autonomous Merchandising
Buyer Product Validation Guide
Exclusive Collaborations - Syncing Unpublished Products
How Inventory Sync Works
How to Solve Shopify "Item Not Recognized" Error
Marking Products as Active or Inactive
Selecting Products
Pricing
Create a Price List For a Smaller Catalog
Editing Price Lists
How to Set Up Pricing
Price List FAQs
Promotional Price Lists and Discounts
Orders
Cancelling Orders
Check Order Status
Fixing an Order Sync Timeout Error
Fulfilling orders from your ecommerce platform
Handling Returns
Packing Slips - Buyers
Packing Slips - Sellers
Sending Test Orders
Invoicing
Configuring Per-Order Fees
How Invoicing Works
How to Delay an Invoice
Partnership Billing Settings
Understanding Per-Order Fees
Platform
- All Categories
- Account Management
- How to Change Your Commerce Type
How to Change Your Commerce Type

When you first create an account with Convictional, you select your company's commerce type to be either a Buyer or a Seller. However, your decision about this may change during the onboarding process. This guide explains how you can switch your commerce type from Buyer to Seller, or vice versa.
Steps to Change your Commerce Type
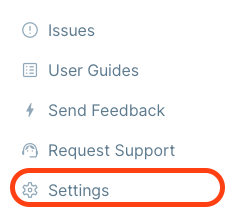
1. Click on the Settings button
The settings button can be found at the bottom left of your screen, and it looks like the screenshot below:
This will open up the settings modal which allows you to specify your account preferences.
2. Click on Company Profile
Now that the settings modal is open, click on the Company Profile option. Reference the screenshot below:
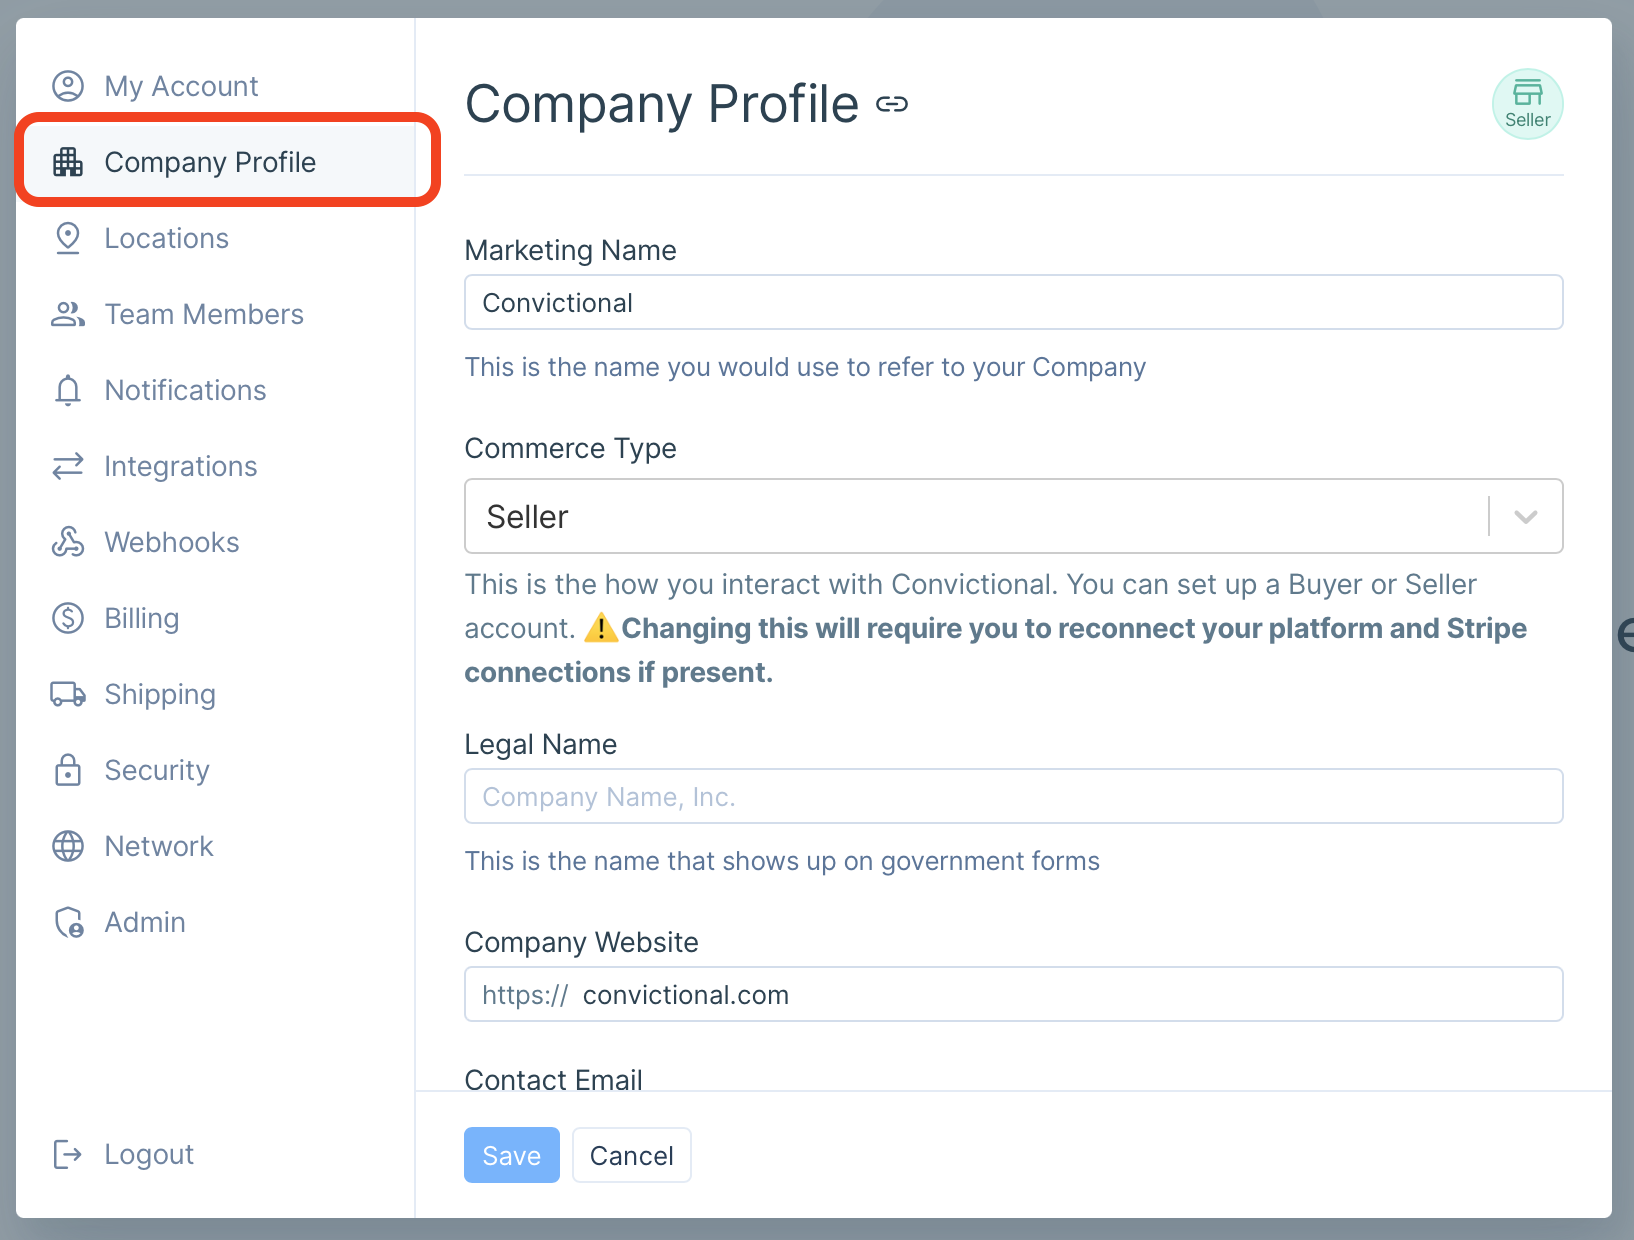
This will open up the Company Profile section, which lets you update various information on your account.
3. Click on the input box containing your current commerce type
If you are able to change your commerce type, you'll be presented with a dropdown that lets you select your new choice. As an example, this is how the input will display if you have a Buyer account set up:
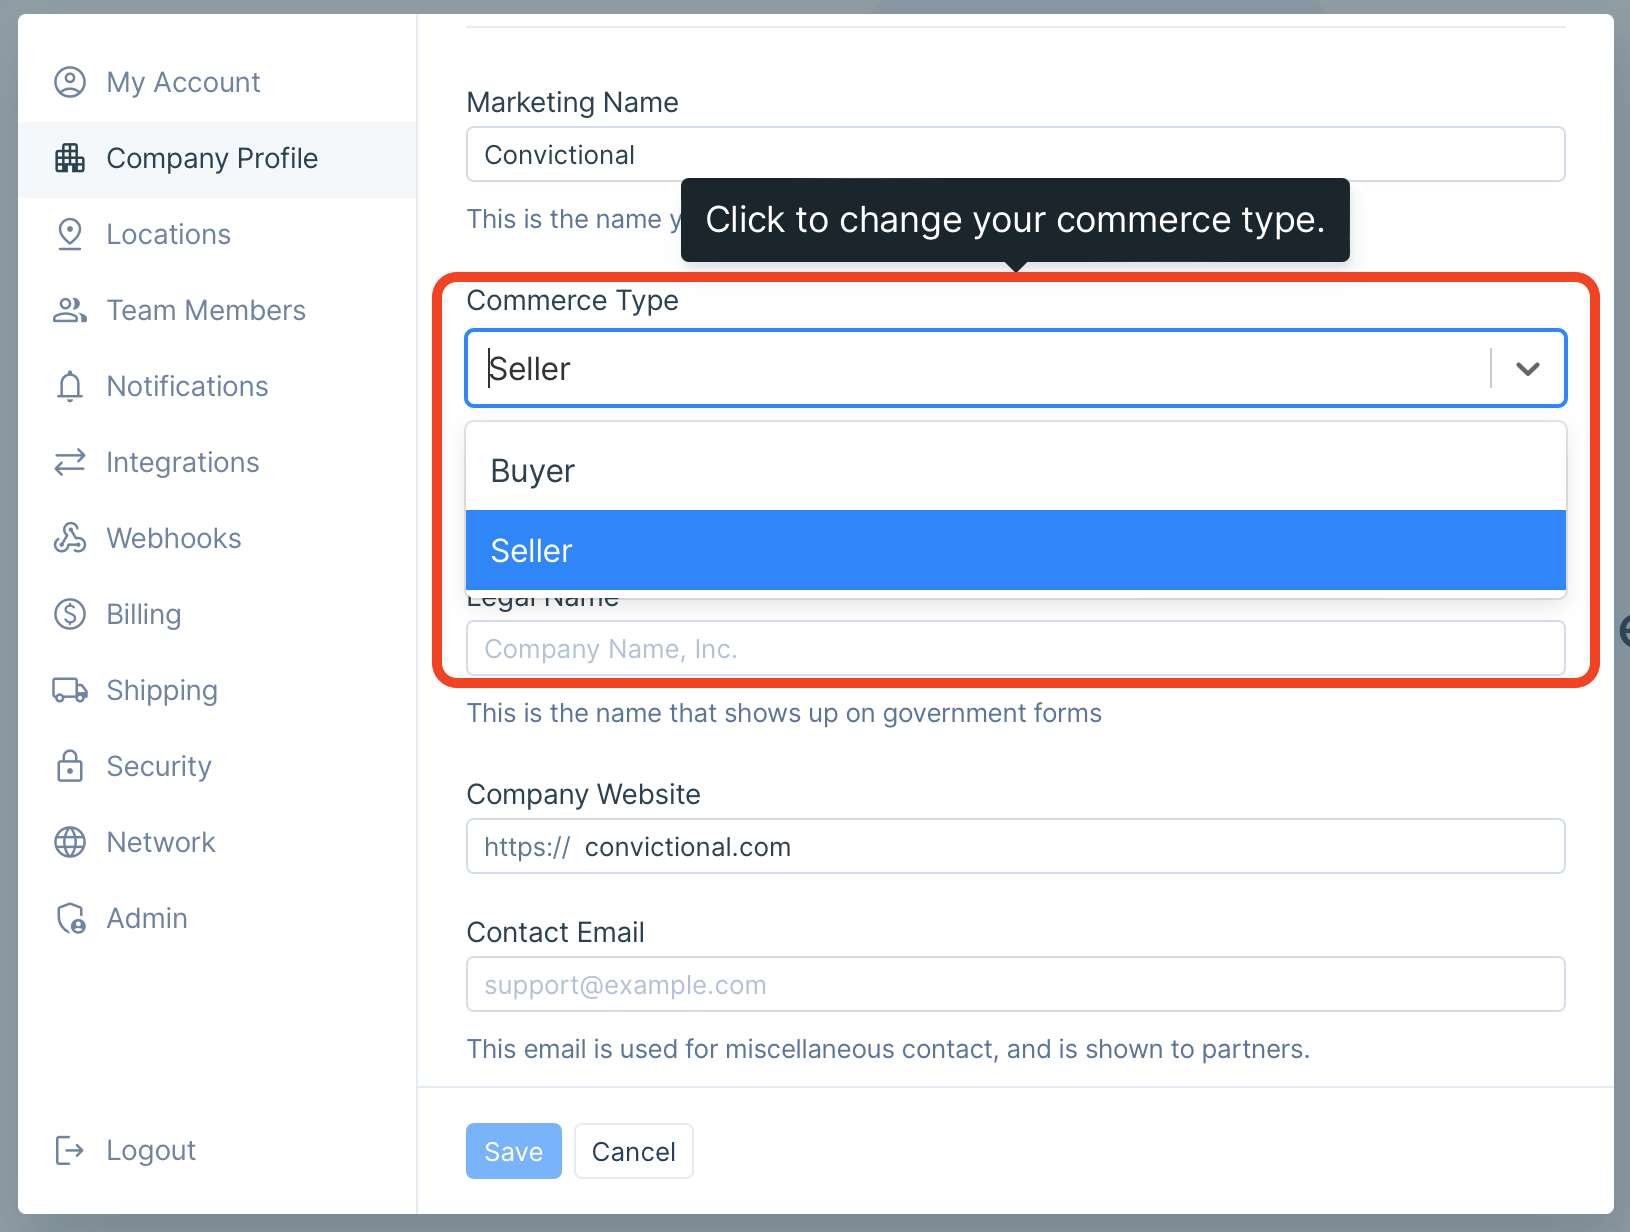
This input allows you to update your commerce type. Once you select your new commerce type, click on the Save button at the bottom of the modal. Your account will be instantly updated! Congratulations! We're excited to have you on Convictional.
It's important to note that sometimes, you will be unable to change your commerce type unless you take certain action. Read the following section for some more details about those situations.
Why Can't I Change My Commerce Type?
There are certain cases where you will be unable to change your commerce type. For example, Seller accounts who have uploaded products will not be able to change their commerce type until they remove their products.
Here is what the Seller will see when they go to update their commerce type:
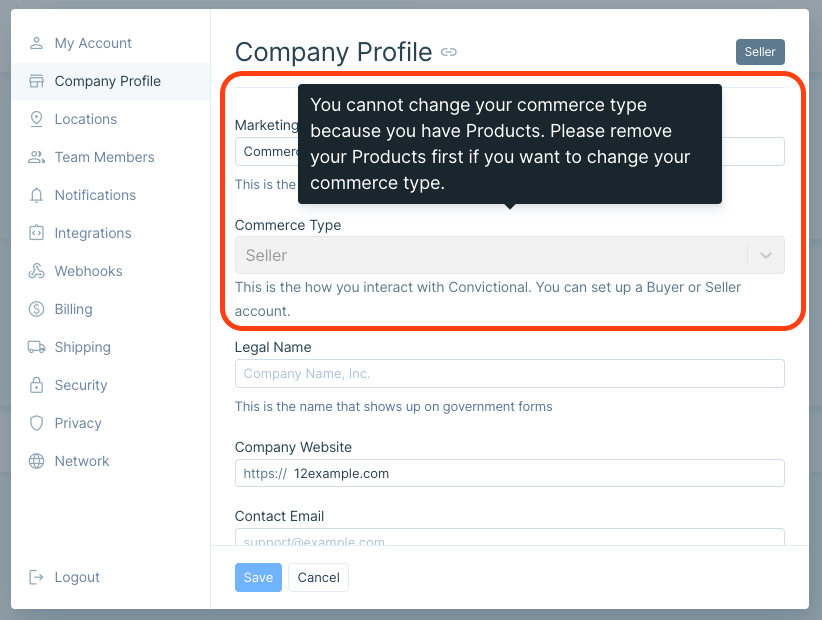
Notice that the input box containing Seller is greyed out, indicating that the update action is currently disabled.
However, if you look directly above the input, you'll notice a tip containing information on what needs to be done to re-enable the input. In this case, the Seller will be able to update their commerce type once they remove all of their uploaded products. If you have a different scenario than this, please reference the tip to learn more about what needs to done to re-enable the input.