Table of Contents
Editing Price Lists

What are price lists and why would I need to edit them?
Price lists are required for sellers in order to establish retail and dropship prices with their retail partners. Price lists may need to be edited in order to add new relevant products or keep your prices up to date. This guide will show you the ins and outs of modifying the price lists and some features we have available to automate this process. If you need help setting up your first price list please refer to Price List Setup Guide for further information.
Manual Price List Editing
Changing individual product pricing
If an individual product has changed in price, or you'd like to set up a custom price for an item that falls outside of the default margins you have established, you can easily do so!
- Navigate to your price list and find the product you'd like to change the pricing scheme on. You can use the search bar for this if you have too many products to navigate through one by one.

- Edit whichever value you need to change and click "Save"

We've defined terms we use in our price lists below:
Margin - The percentage or fixed amount that is taken off the retail price to calculate the earned amount
Your Retail Price - The retail price synced from the sellers platform. If there is no currency difference in the partnership, this will also be the retail amount sold to the buyers customer.
Suggested Retail price - The retail price multiplied by the conversion factor to account for currency differences. This is the price the buyers customer pays for a product
Conversion factor - Used to convert the Seller Retail price into the Buyer Retail price depending on the difference in the currencies being used in the partnership.
You Earn - The amount the seller is paid by the buyer for fulfilling that product
Changing product pricing in bulk
You can update product pricing per price list page in bulk by following the steps listed below:
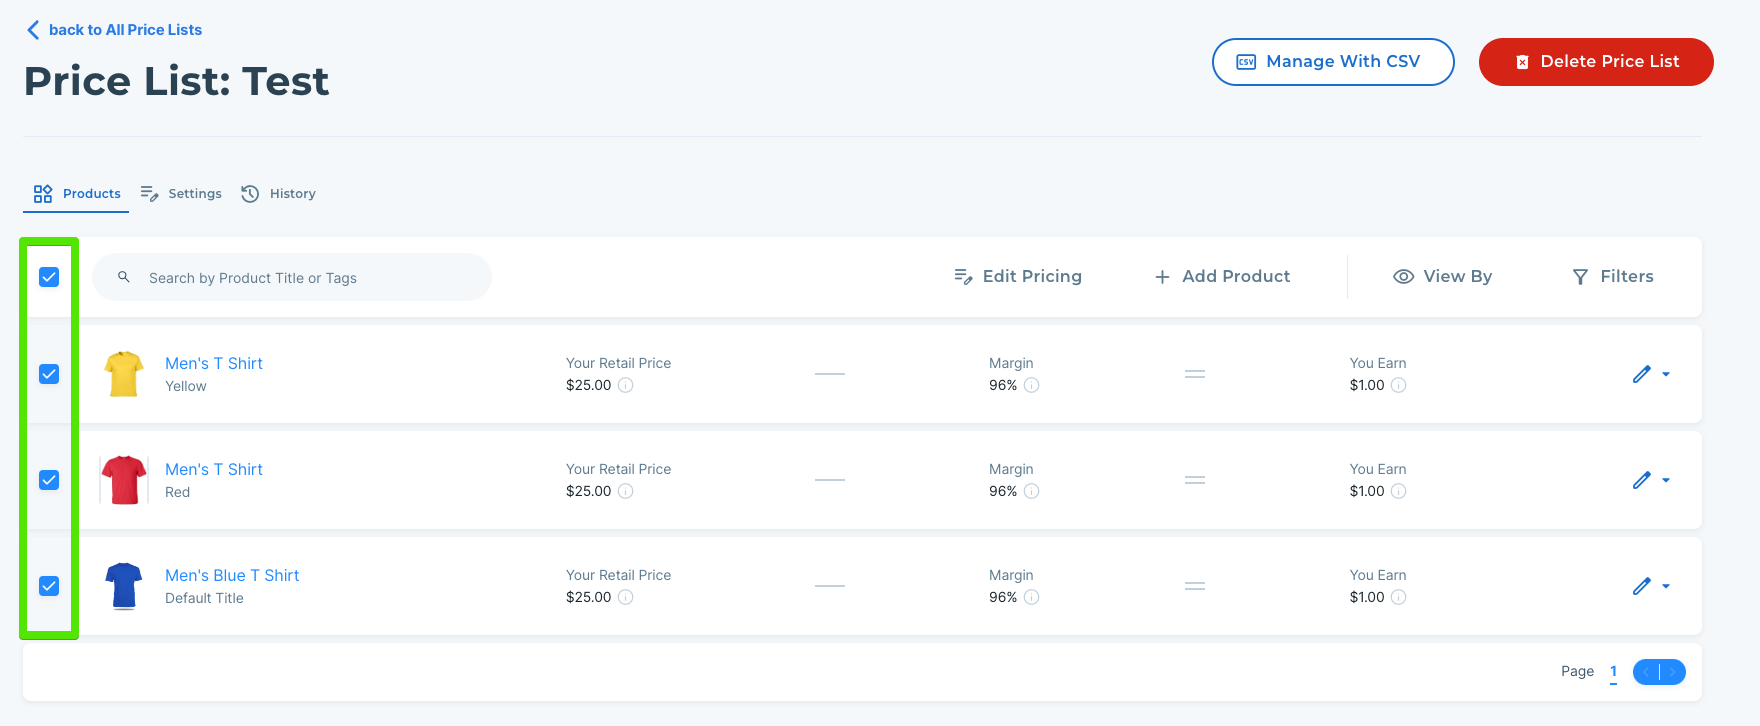
- First, select the items on the page you would like to edit in bulk, the option in the top left will select all items on the page:
- Once those options are select you can choose to 'Edit Pricing' showing beside the 'Add Product' button. From there you will have the options to update the Retail and You Earn price for the selected products, or update the margins in bulk:
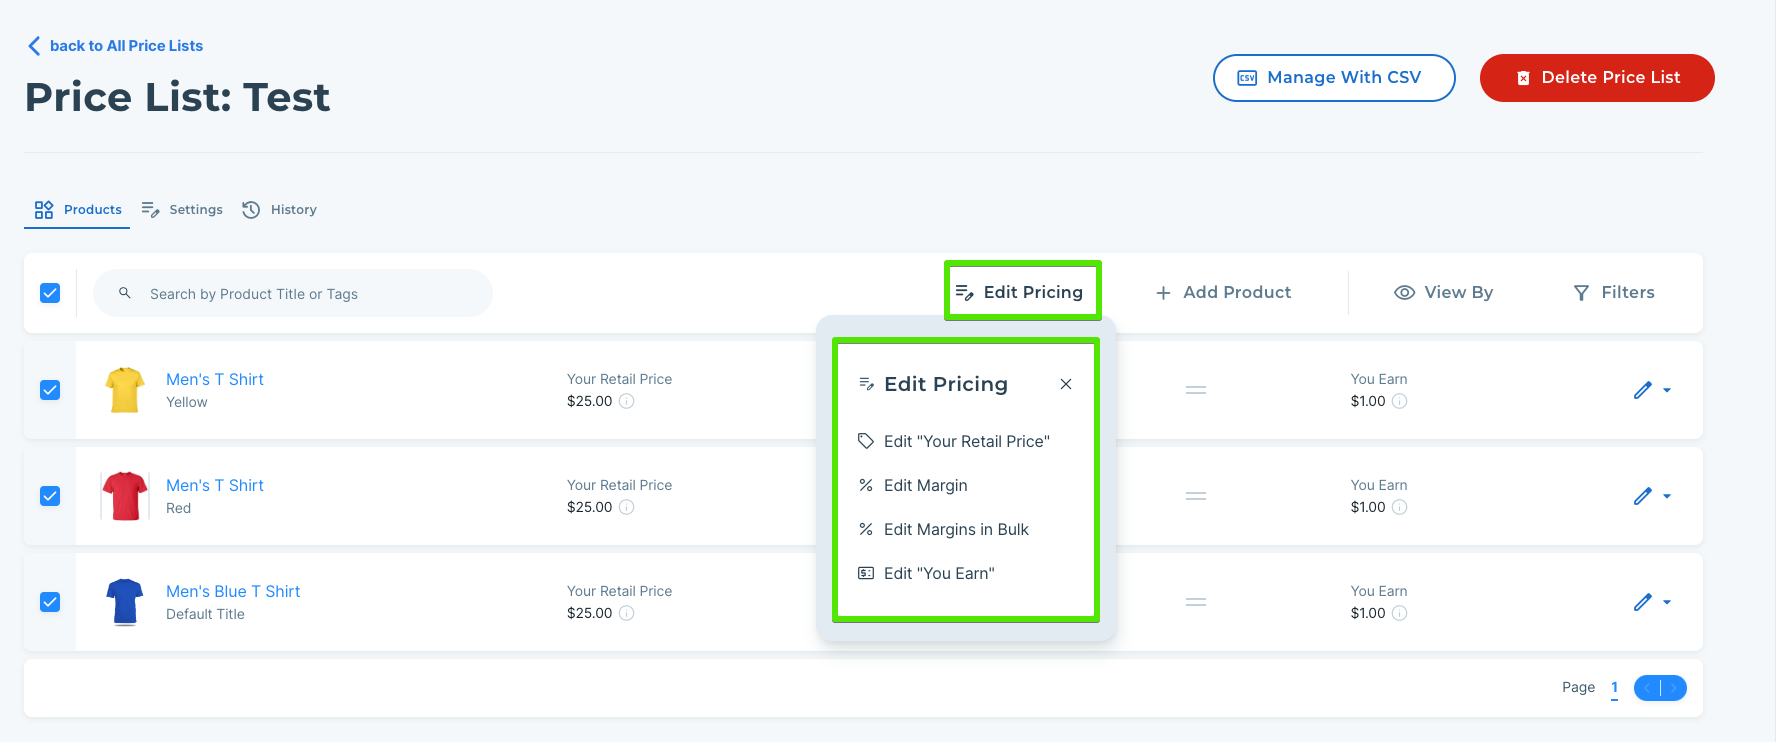
- From there you can update the desired fields and those changes will take effect within 1 hour of saving the changes. Be sure that the partner you are updating prices for is the partner assigned to this price list.
Price List Editing using a CSV file
If you have a large catalog or list prices different from D2C and B2B orders you may want to use a CSV file to update your product pricing.
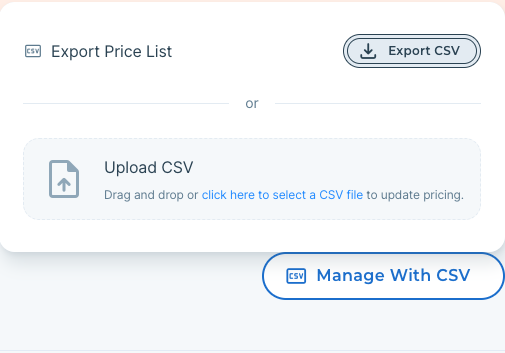
To use a CSV file you will first need to create a price list as normal. Once the list is created you will see the option to 'Manage with CSV file' and the option export and upload those files.
In order to update the pricing the CSV file must be in the format exported by the price list so always export the list before editing prices. Do not use an old CSV file and upload that into a new price list as it will not update correctly.
Once you have exported the file you will be able to edit the template as showing below:
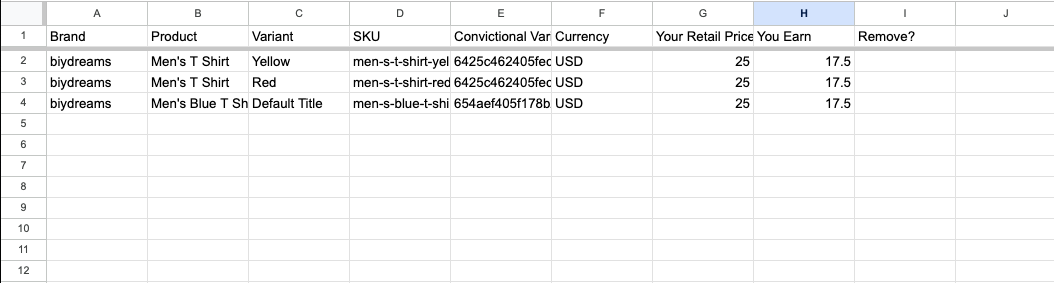
Before making changes to the CSV file, please review the best practices below:
- Price list spreadsheets must be uploaded in CSV format. Other formats such as .xlsx will produce an error. We recommend using Google Sheets to manage the CSV file as their service automatically exports files in the correct format (UTF-8)
- When creating a price list, you will have to option to include all Active products in Convictional in the price list. CSV's can only remove items from the price list and cannot add new products. If you need to add a batch of new products to the price list and manage them using a CSV you can first create a new price list. To remove an item from the list add a 'Yes' to the 'Remove?' column
- If the prices you are updating do not use the same retail price as what is listed in your ecommerce platform or the margin will vary from product to product to reach a desired 'You Earn' Price, you need to toggle the 'Ignore Product Updates' feature before uploading the CSV. That setting will prevent the changes you've made with the CSV file from reverting to what they were before.
- The Currency listed in the column of the same name refers to the seller currency in the price list settings. If you need to adjust prices to compensate for a difference in currency you will use the Conversion Factor setting to adjust prices for that difference.
Once you have updated the pricing as desired you can go ahead and upload the CSV through the same modal:
Changing price list settings
Modifying the price list settings on the right hand side of your price list will affect your price list as a whole and will apply to every product currently listed.
List Name
This is the name of your price list. This name will be visible to your retail partner so it is a good idea to include some context into the price list. A common example is something like "<Company Name> <Date>.
Buyers Assigned To This Price List
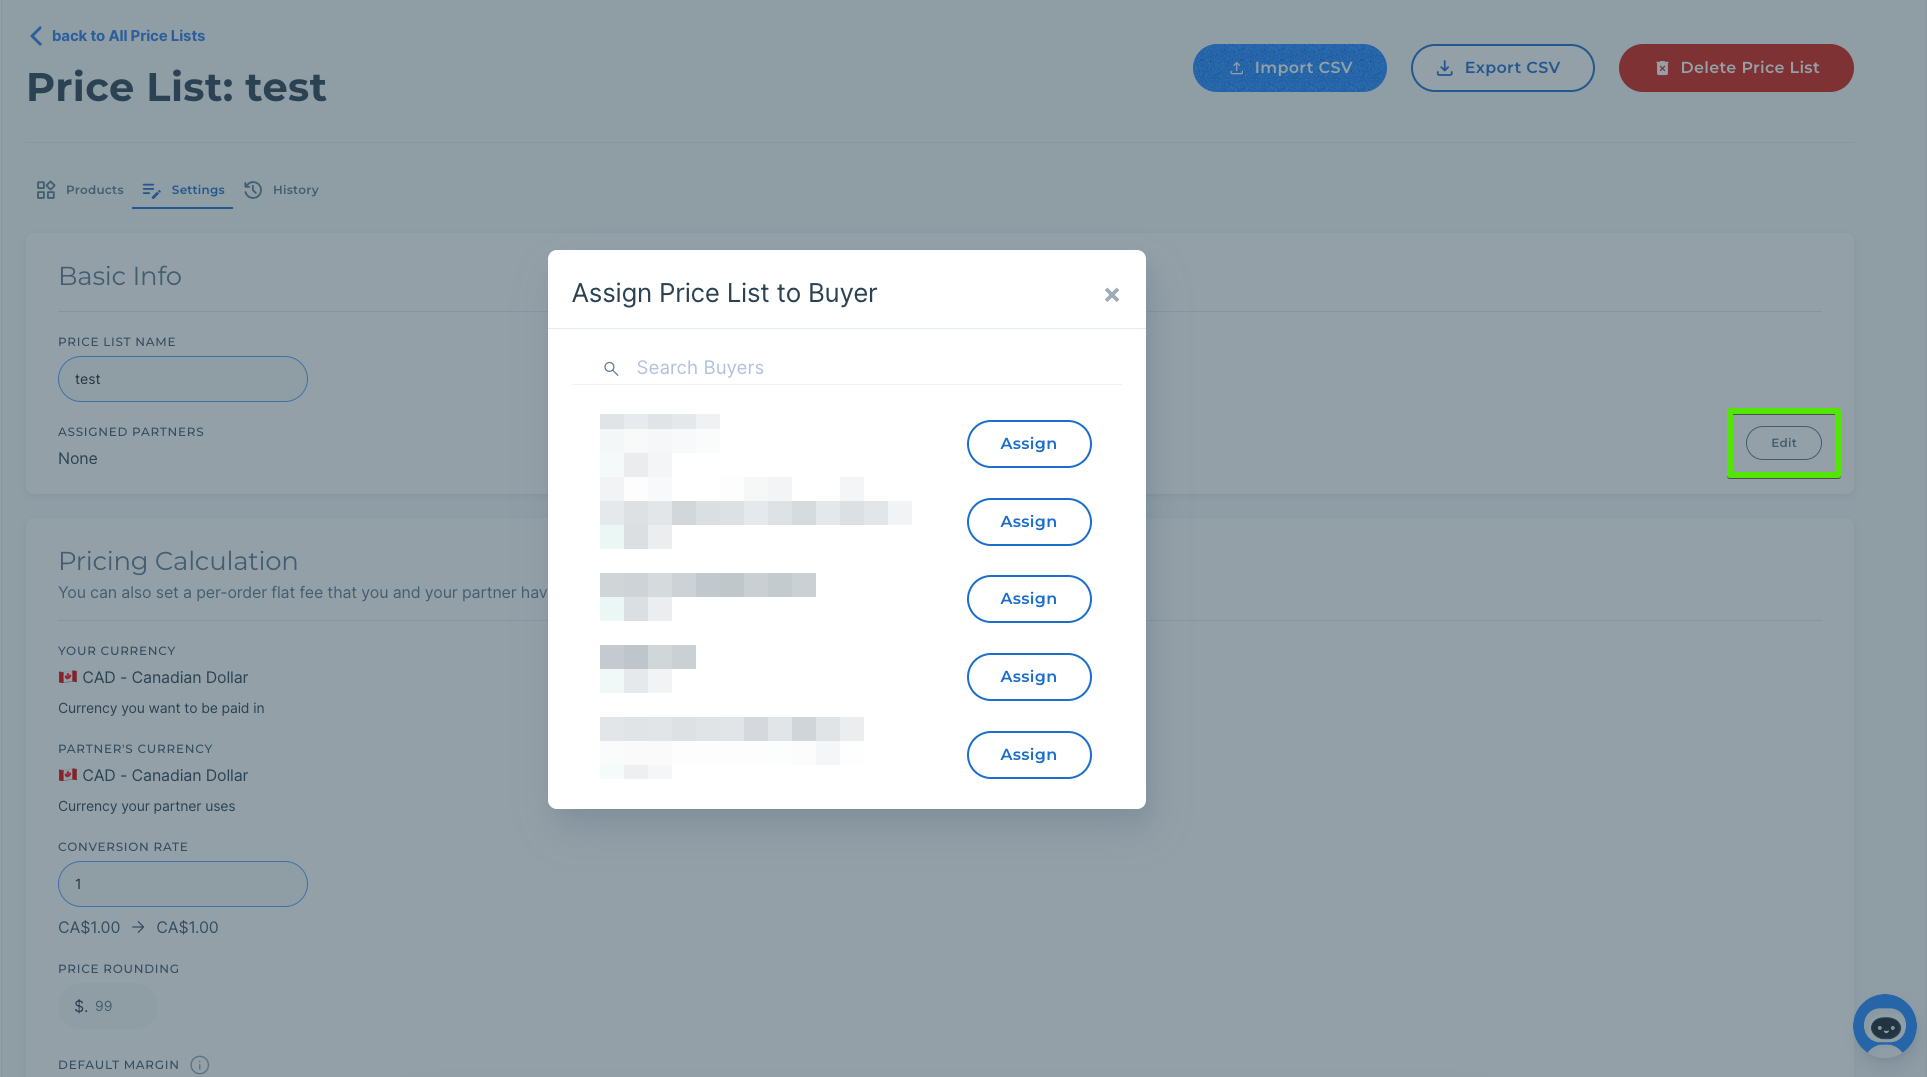
This feature is what allows you to assign a specific price list to a retailer (AKA Buyer). Having your price list assigned to a retailer is mandatory. If this is missing, your partner will not be able to sell your products on their platform. You are able to assign multiple buyers to one price list. This can be modified at any time to include as many or as few retailers as you wish. To modify, click the edit button and you will be able to select all available retailer partners.
Margin
This is the margin field, which you may already be familiar with when setting up your price list. This option establishes the difference between the retail price the end customer pays for the product and the price that your retail partner will pay for the product. When you edit this field, it will modify the dropship price of every single product listed in the price list.
If you have a $100 product with a 50% margin, your retail partner will pay you $50 for the product while the customer pays $100.
Apply to New Products
This feature will automatically add new products you create into the price list. We will touch more on this feature in the Automated Pricing section below.
Ignore Product Updates
This feature will ignore any pricing changes you make to a product outside of the price list. We will touch more on this feature in the Automated Pricing section below.
Your Currency and Buyer Currency
This is a static setting of your price list and shows the currency you sell in, versus the currency that the buyer sells in. This cannot be changed. If you need to change this value, you will need to create a new price list.
Conversion Factor
Since Convictional does not determine currency conversion at market rates, this setting allows you to set a custom static currency conversion rate. Modifying the conversion factor setting will change the retail price of every listed product to match the updated conversion factor.
Retail Price Format
When setting up a margin, it may change your prices to not match the pricing scheme that you prefer for your products. For example if all your products end in $0.99, you will change this value to 99. If you prefer all your prices to be exactly on the dollar you can put in 00. Leave this field blank if you are not concerned with pricing format.
Automated Price List Settings
Automated price list features are a powerful tools to eliminate the need to adjust your price list when you add new products or change your retail prices.
Apply to New Products
In the ON position
New products synced into Convictional will be added to this price list automatically. When the products are added they will automatically use the dropship margins that you established when setting up your price list. Below you can see I added a new product with a few variants and they have been priced automatically:
In the OFF position
Newly created products synced to Convictional will NOT be added to this price list for dropshipping. This indicates that any products you wish to sell will be manually added to the price list. In order to add new products you'll need to select 'Add Product' and select the new products by searching for their product title as showing below:
Ignore Product Updates
In the ON position
Updated products synced to Convictional will NOT be reflected in this price list for dropshipping. It is important to note that having this in the on position will disable automatic pricing discounts.
In the OFF position
Retail price updates synced into Convictional will be reflected in this price list automatically. The updated retail prices will reflect the dropship price discount you have established when setting up the price list. It is important to note that having this in the off position will enable automatic pricing discounts.