Connecting through Seller EDI for Dropship

A step by step guide to setting up a new Seller EDI connection.
This guide is for those looking to connect to Convictional through EDI and they are a seller. A seller is someone selling a product and responsible for fulfilment of orders. We are assuming you or someone on your team have some prior knowledge of EDI. Only some steps are EDI specific, others are general onboarding steps or SFTP specific.
If you are not trying to connect through EDI, here are our other integration guides. If you are a buyer and trying to connect with an EDI seller, feel free to share this document with them.
We will walk through the dropship use case in this guide. A wholesale guide will be written independently.
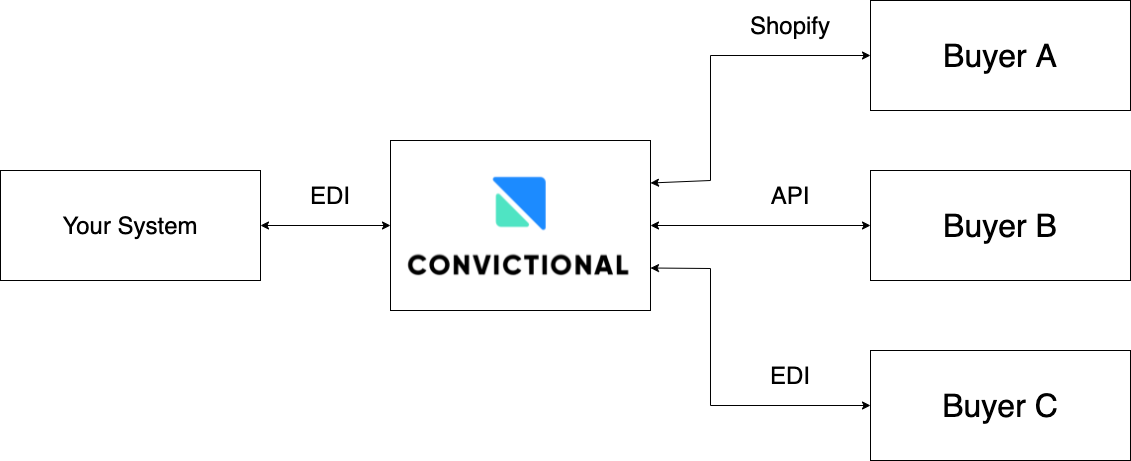
The standard practice for EDI is to set up a single connection to VAN or set up each direct connection to each vendor. You are setting up a connection to our system, and we will facilitate the data flow into your partner systems through our existing integrations.
Onboarding
As mentioned above, you are onboarding into Convictional. This will allow you to more easily manage your connections between one to many trading partners. Convictional has built a very robust , but flexible way for self-serve onboarding.
Please read through the onboarding steps to understand what is required for each one. We understand with seller EDI you usually are building into the trading partner system. In this case, that is also happening but with more flexibility. Each trading partner will have a different set of requirements but for the most part you can get started with very little information.
Our minimum EDI specifications are listed below. This will get you “Convictional transactional”, but there may be additional requirements per trading partner.
- Inventory Update (846)
- Purchase Order (850)
- Purchase Order Acknowledgement (855)
- Advance Ship Notice (856)
In this guide, we will go through Convictional's EDI specifications.
Here are copies of the Convictional demo sample files for this tutorial.
ISA*00*          *00*          *ZZ*YOURISAID12345 *01*117522184      *210629*1827*U*00401*000000001*1*P*>~
GS*IB*YOURISAID12345*117522184*20210629*1827*99*X*004010~
ST*846*0001~
BIA*00*MB*00001*20211117~
LIN*1*UP*123456789029~
QTY*33*1*EA~
LIN*2*UP*123456789036~
QTY*33*2*EA~
LIN*3*UP*123456789043~
QTY*33*3*EA~
LIN*4*UP*123456789050~
QTY*33*4*EA~
LIN*5*UP*123456789012~
QTY*33*5*EA~
LIN*6*UP*123456789067~
QTY*33*101*EA~
LIN*7*UP*123456789074~
QTY*33*102*EA~
LIN*8*UP*123456789081~
QTY*33*103*EA~
CTT*8~
SE*20*0001~
GE*1*99~
IEA*1*000000001~
ISA*00*          *00*          *01*117522184      *ZZ*YOURISAID12345 *210517*1900*U*00401*000000004*1*P*>~
GS*PO*117522184*YOURISAID12345*20210517*1900*1*X*00401~
ST*850*0001~
BEG*00*NE*4**20210517~
N1*ST*John Smith~
N3*123 Fake St*Apt 1~
N4*Waterloo*ON*L6M5A9*CA~
N1*BT*John Smith****~
N3*123 Fake St*Apt 1~
N4*Waterloo*ON*L6M5A9*CA~
PO1*1*2*EA*64.35*PE*UP*012345678905*SKU*SAMPLE-SKU*VP*SAMPLE-SKU~
PID*F****Product Title 1~
CTT*1~
SE*12*0001~
GE*1*1~
IEA*1*000000004~
ISA*00*          *00*          *ZZ*YOURISAID12345 *01*117522184      *210629*1827*U*00401*000000059*1*P*>~
GS*IB*YOURISAID12345*117522184*20210629*1827*99*X*004010~
ST*855*0001~
BAK*00*AD*2*20210423~
PO1*1*****UP*123456789036~
ACK*IA*2*EA~
CTT*1~
SE*6*0001~
GE*1*99~
IEA*1*000000059~
ISA*00*          *00*          *ZZ*YOURISAID12345 *01*117522184      *210629*1827*U*00401*000000059*1*P*>~
GS*IB*YOURISAID*117522184*20210629*1827*99*X*004010~
ST*856*0001~
BSN*00*0101779964*20210423*1545~
HL*1**S*~
TD5**2*CPC*M*Canada Post*******G2~
HL*2*1*O~
PRF*2~
HL*3*2*P~
MAN*CP*1234567~
HL*4*3*I~
LIN*1*UP*123456789036~
SN1**1*EA~
CTT*1~
SE*14*0001~
GE*1*38027~
IEA*1*000000059~
ISA*00* *00* *01*117522184 *ZZ*SAMPLEISAID *210423*2004*U*00401*000038030*0*P*}~
GS*IN*117522184*SAMPLEISAID*20210423*2004*38030*X*004010~
ST*810*0001~
BIG*20210423*9200543422**4541811000~
CUR*SE*CAD~
IT1*00010*1*EA*17.55**UP*028295461111***PO*4541811000~
IT1*00020*1*EA*22.75**UP*028295452222***PO*4541811000~
TDS*4634~
TXI*GS*3.04~
TXI*SP*3~
CTT*2~
SE*17*0001~
GE*5*38030~
IEA*1*000038030~
We will not be using the Invoice (810) document in Step 7: Testing, however, we will review Convictional's 810 specs in Step 5: Configure EDI. For the invoicing, it will be automated through Stripe. You can read more about it here. For the Price Catalog, we will use the Convictional web application to setup the price lists. For product updates, they will go through the CSV mapping flow.
We will be using barcodes and barcode types to reference our variants. There are three ways to make references:
- Barcodes
- Convictional Variant IDs
- Seller SKUs (Not recommended)
In this guide, all variants will be referenced using barcodes. Each barcode must be unique.
Step 1: Sign Up
The very first step is to sign up for a Convictional account. Our platform is open to the public. It doesn’t require connecting with our sales team (you can if you want). The pricing can be found here.
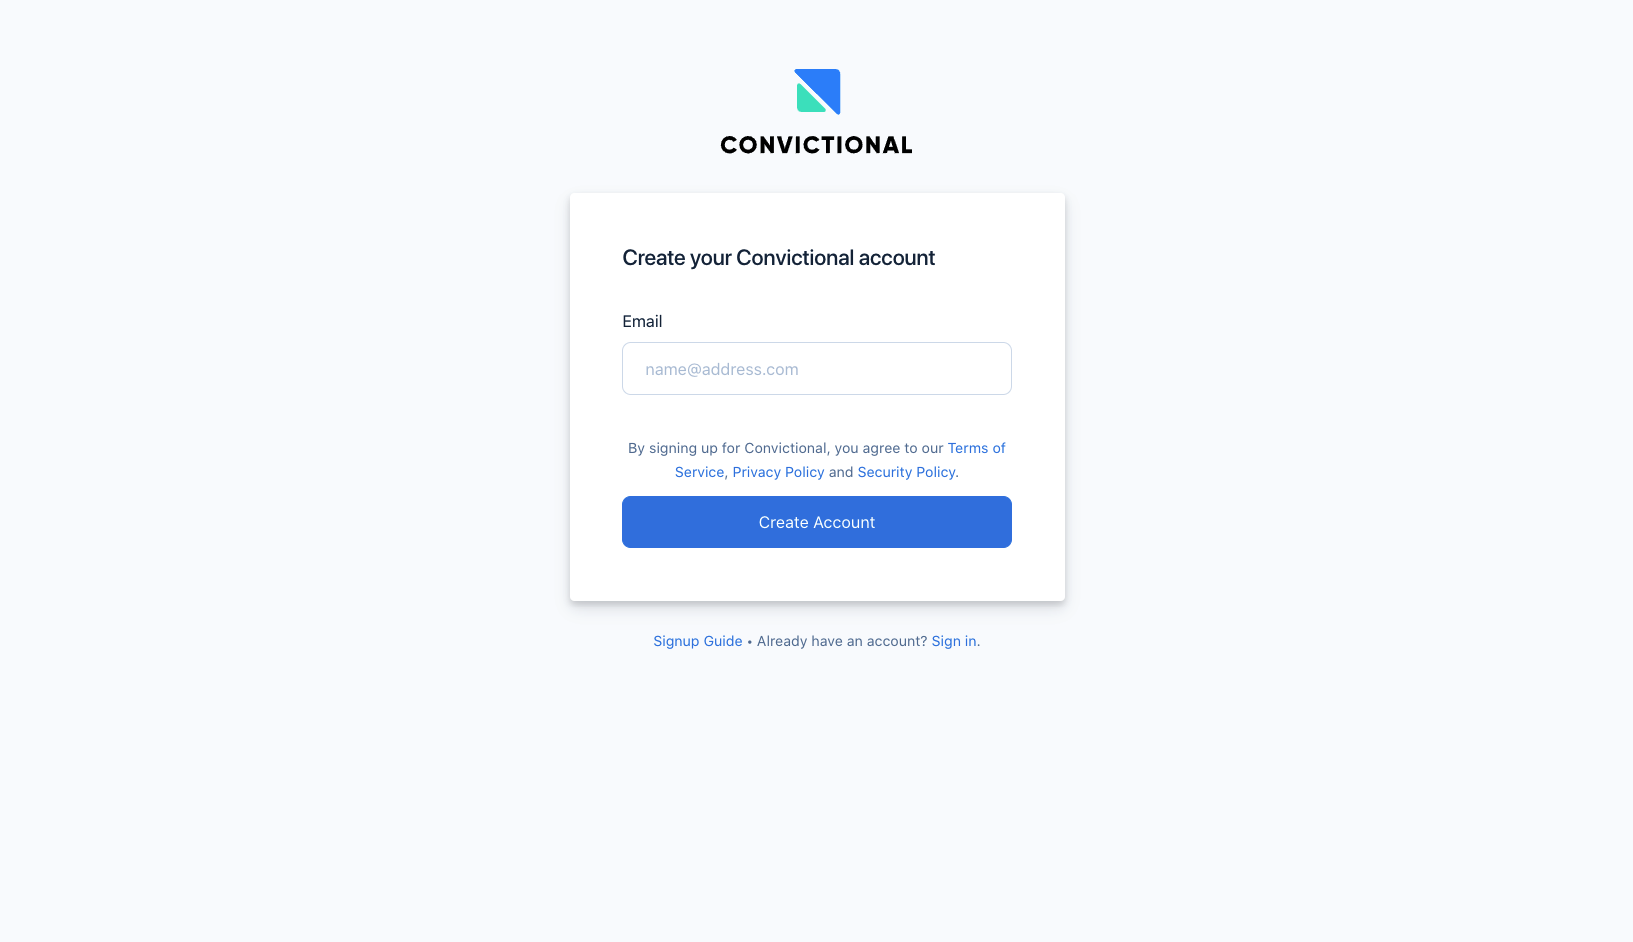
Convictional uses a passwordless login, so check your email for a magic link.
You will be directed to the Convictional company setup page. On this page, you will provide some additional information about your company. You will have the opportunity to select your platform as well.
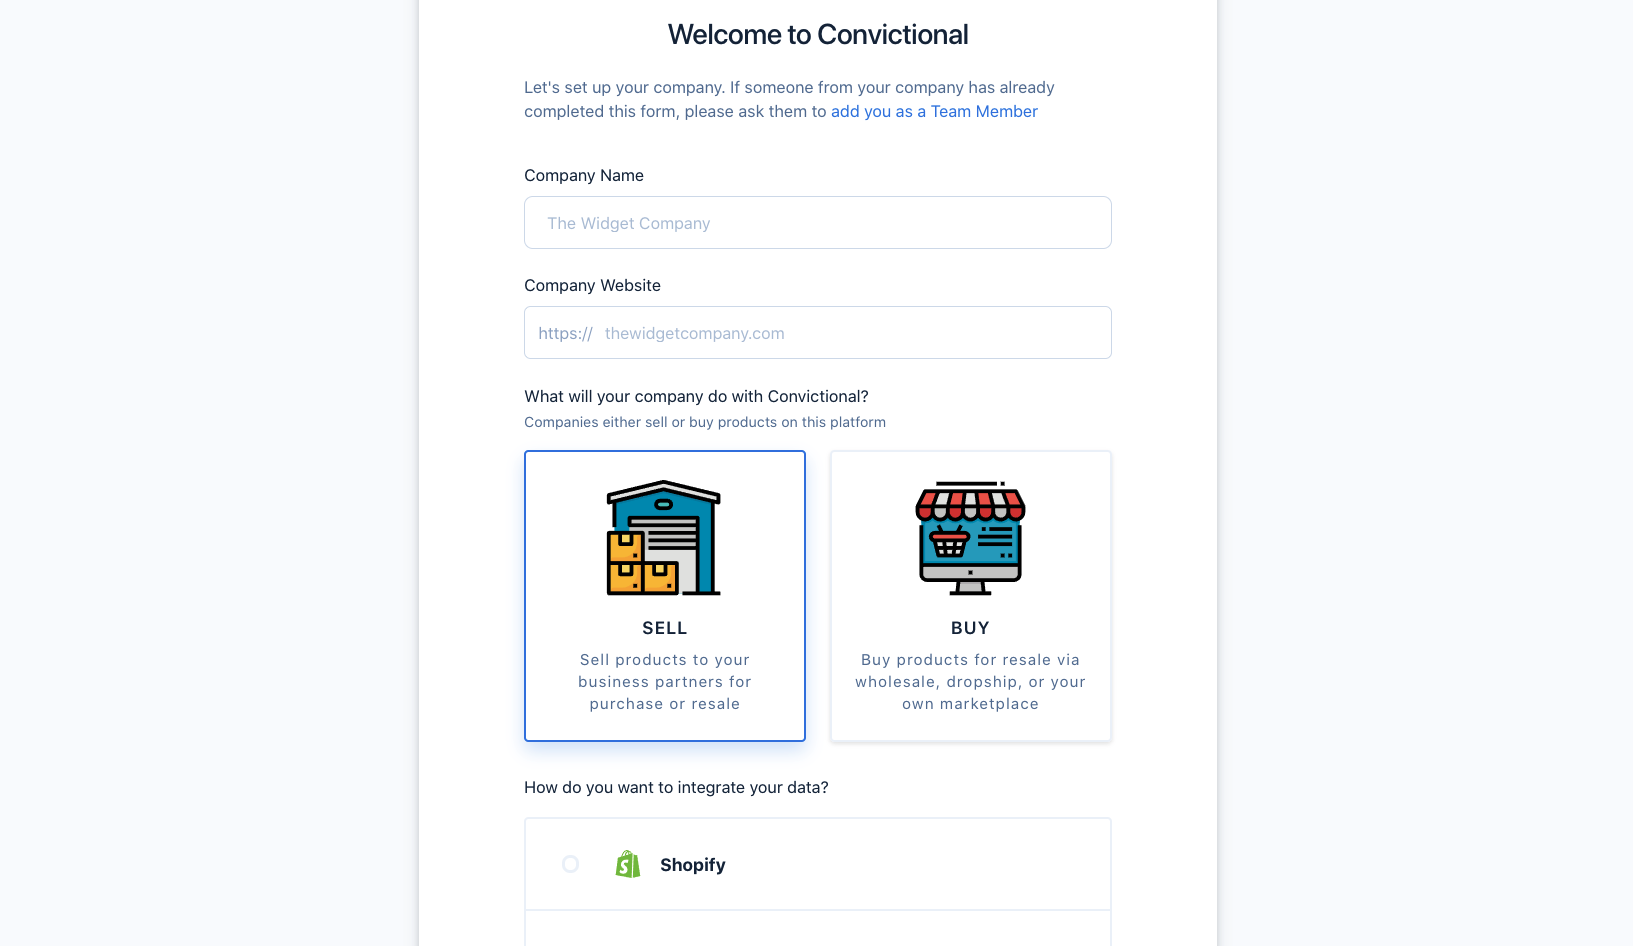
Convictional has buyers and sellers. For the guide, you will be signing up as a seller.
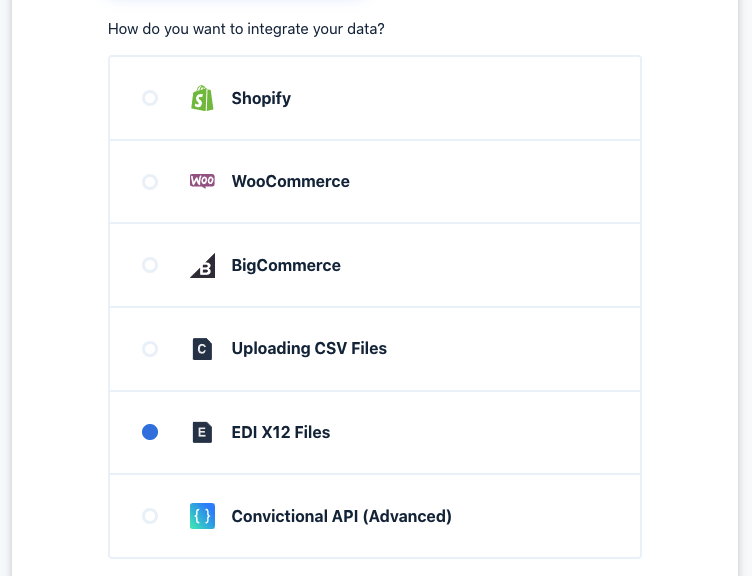
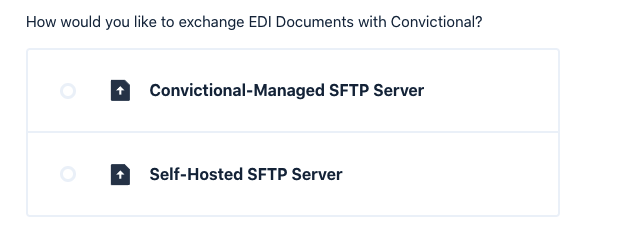
We are going to select “EDI X12 Files” for how we want to integrate our data. The follow up question is the method of transporting the information. Many enterprise companies have their own SFTP servers, and for the purpose of this tutorial, we will connect with a Self-Hosted SFTP server.
Hit the “Review Company” button, review the details, then hit “Create Company”. You will be directed to the getting started page.
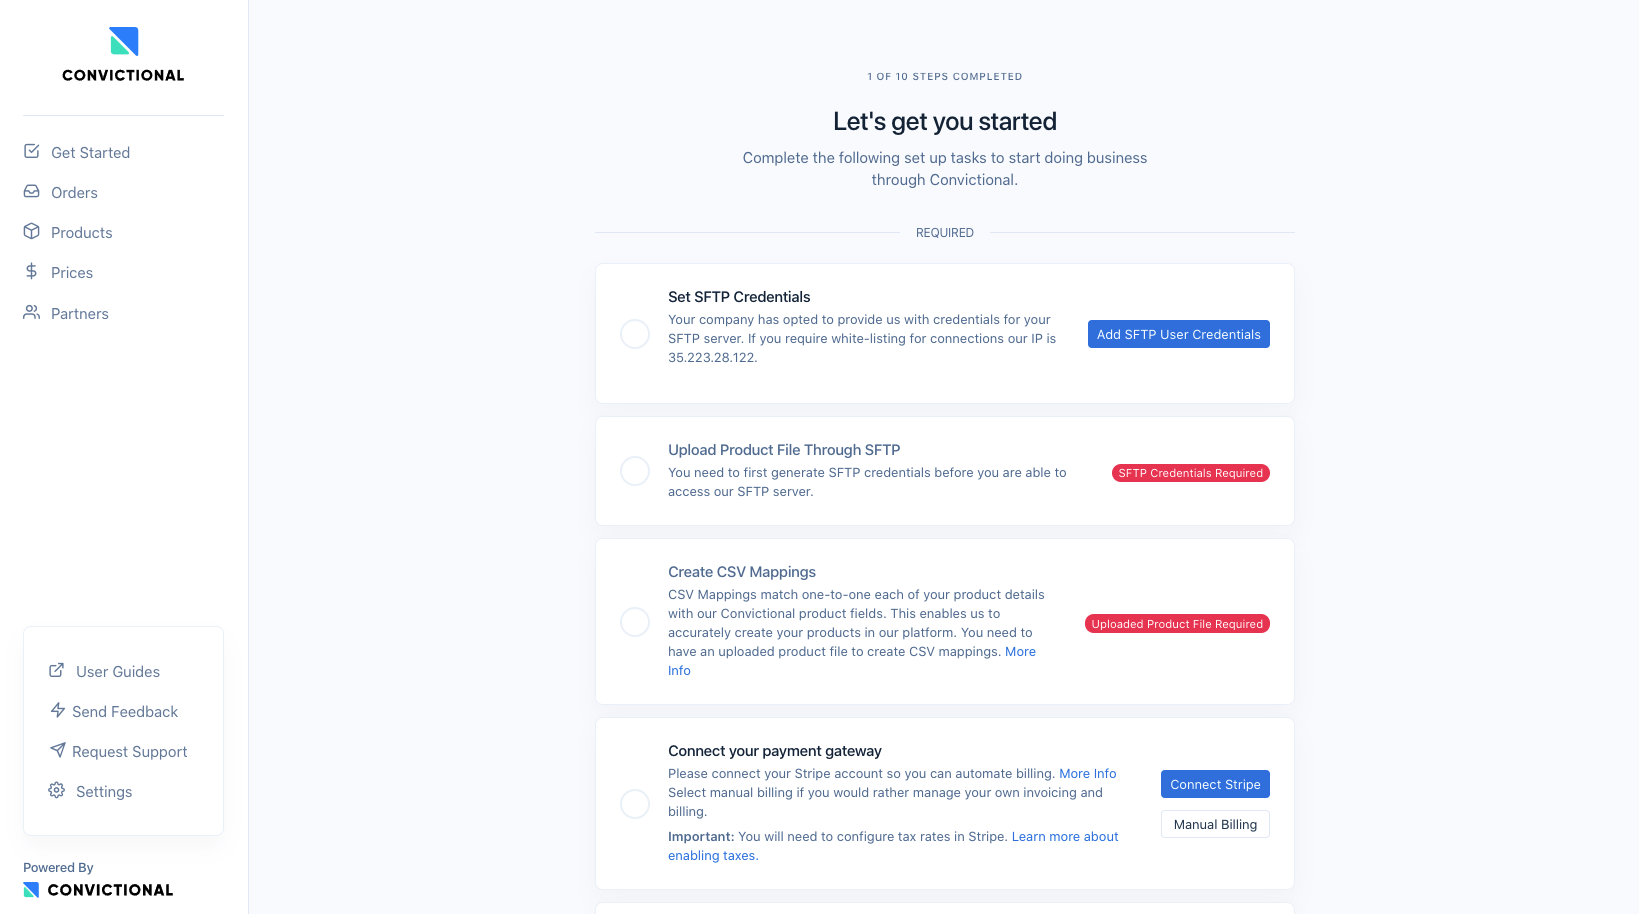
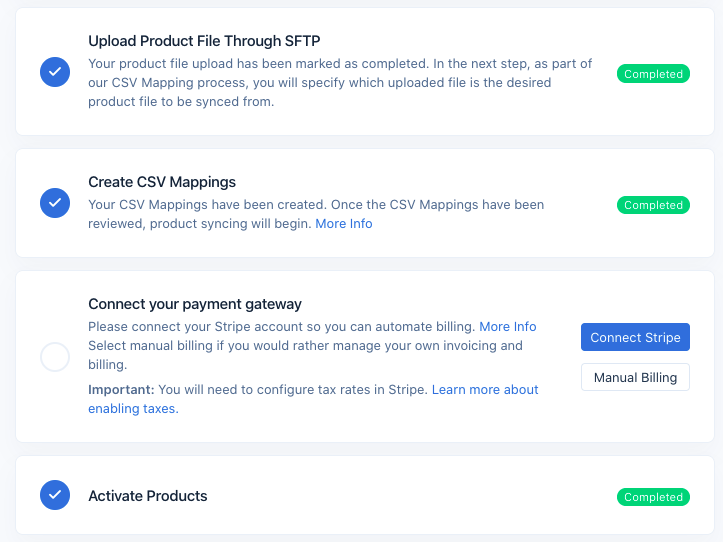
On this page, you can see each “Getting Started” card. The required ones are listed at the top and the optional are listed below. In this tutorial, we will step through all the steps.
Step 2: Setup SFTP
Convictional uses SFTP as our transport layer. If you are wondering, why not a Value Added Network (VAN)? We answer it here. If you want to know the difference between Convictional managed and self-hosted, read more here.
Both sub-sections "Convictional Managed SFTP" and "Self-Host SFTP" go through similar steps but are dependent on your setup. Go through the section that correlates to you, then move onto Step 3.
Convictional Managed SFTP
The first step is create a set of credentials within Convictional.
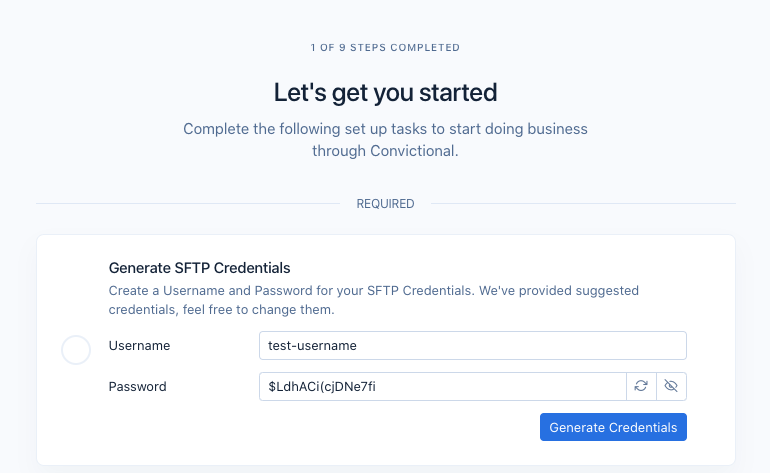
You can modify the user and password if they don't meet your security requirements. Once ready, hit "Generate Credentials". You can connect to our SFTP server using that username and password, along with the information below:
- Host: sftp.convictional.com
- Port: 2122
- Directory: /
You should upload all documents to /outbound and download all documents from /inbound.
Self-Hosted SFTP
These are the steps if you selected the “Self-Hosted” during company setup. Start by clicking “Add SFTP User Credentials”.
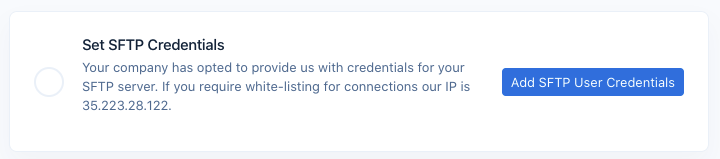
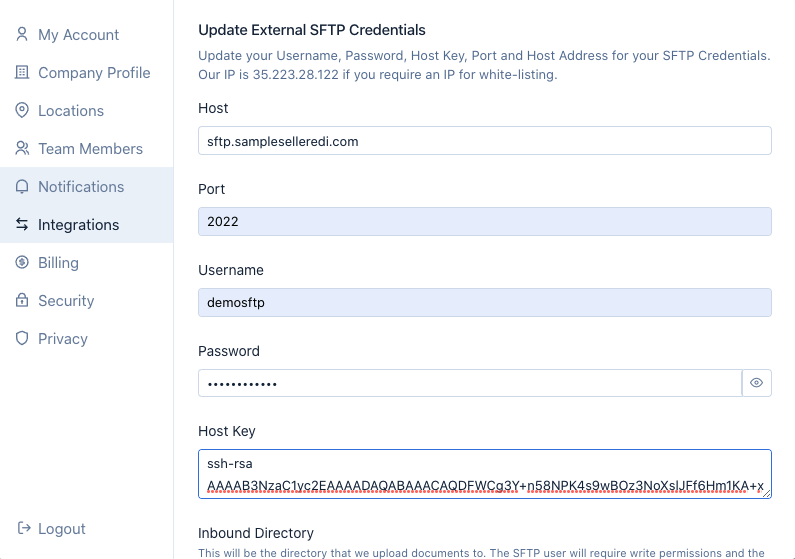
On your screen, you should see a dialog appear. This will allow you to enter in your SFTP credentials. If you require an IP address for whitelisting, you can find it listed. We will access your network only using this static address. For any reason this changes, we will contact your team or you will be notified through TradeOps Issues.
You will need to create a new SFTP user. This user should have read and list permissions on the directory that you will place your outbound files on. These are files going to Convictional. The SFTP user will require write permissions on the inbound directory. These are files going into your network produced from Convictional. In addition, depending on your method of archiving, we will need additional permissions. If you want files to be deleted after they are processed by Convictional, we will need delete permissions on the outbound directory. If you want files to be moved into a subdirectory, we will need write permissions on that subdirectory. As a part of our onboarding, we will confirm this is all set up properly.
Enter in all information related to the SFTP user.
Next fill in all information related to the SFTP directories.
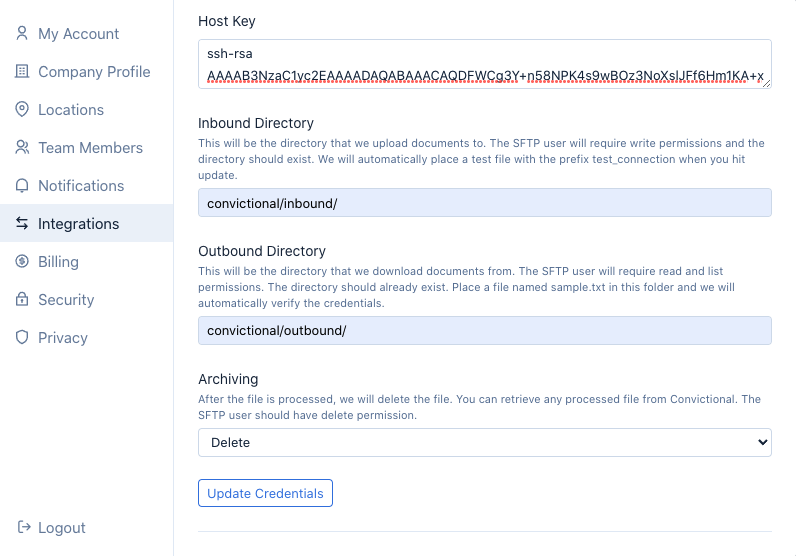
As you can see, you must put an empty file named “sample.txt” in the outbound directory. When we save, we are going to validate that we can list and read this file. As well when we save, we are going to write a file in the inbound directory that is prefixed with “test_connection”.
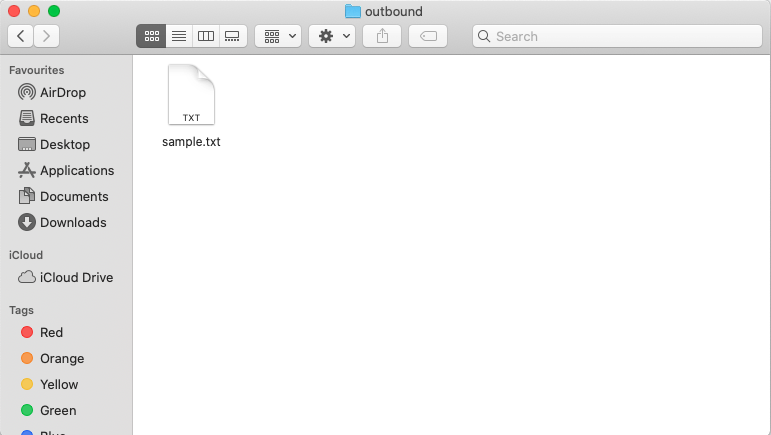
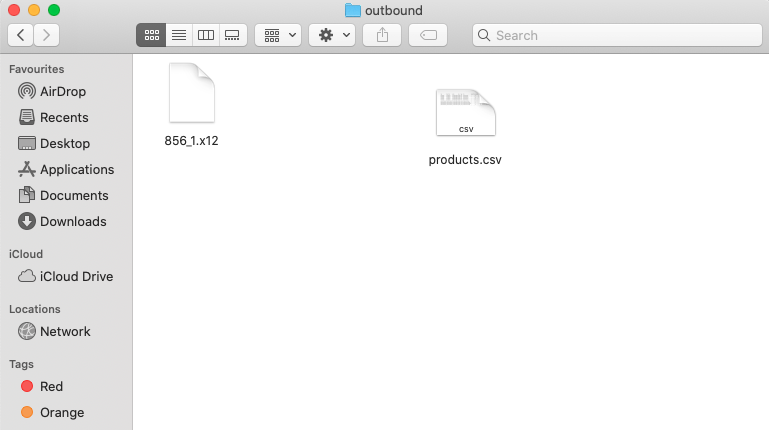
Below is my outbound directory before hitting “Update Credentials”.
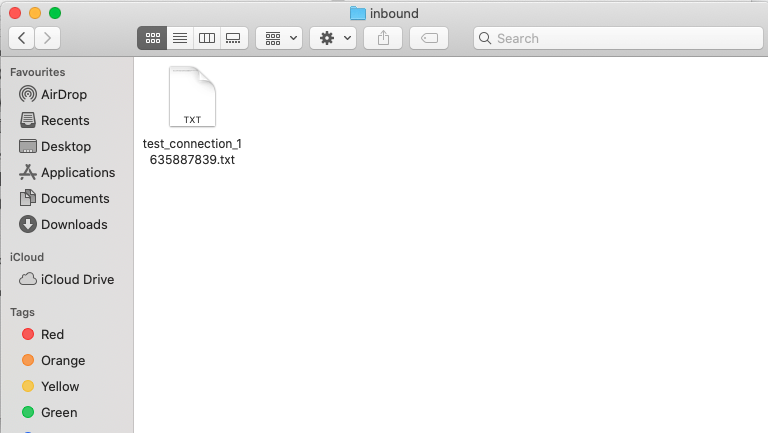
Hit “Update Credentials”. If everything is set up correctly, you should a see a success message.

Your outbound directory should be empty if your archive method is set to delete. If it’s set to move, your archived directory should have the “sample.txt” file. Your inbound directory should have a test file.
The contents of this file should be similar to this.

You are all set up for the SFTP connection.

Step 3: Upload Products
There are multiple methods for uploading product data into Convictional (API or CSV). Most users connecting through EDI will use our CSV approach for product information. You can make updates to your variants within those products with some EDI documents (Ex. 832 or 846), but the initial product information will need to be seeded.
There are two files: products.csv and inventory.csv. In this guide, inventory updates will be done through EDI. Here is a more specific guide around the structure of the products.csv file. You will need to populate this file either manually or using a batch system.
For this demo, we will use this template. Download it, and update it with your product information. Add a barcode and barcode type for each of the variants. This is a sample:
"Code","Product Title","Vendor","Type","Tags","SKU","Variant Title","Inventory Quantity","Price","Image URL","HTML Body","Option1 Name","Option1 Value","Option2 Name","Option2 Value","Option3 Name","Option3 Value","Barcode","Barcode Type","Dimension Length","Dimension Width","Dimension Height","Dimension Units","Weight","Weight Units","Google Category Code","Google Category Name"
"led-high-tops","LED High Tops","Convictional Apparel","Apparel","men","led-high-tops-US 8","","14","74","https://cdn.shopify.com/s/files/1/0018/5617/6150/products/putting-on-your-shoes_925x_f71c19ac-c091-4c7f-bbfe-a43d6a0456b7.jpg?v=1545334661","Black high top shoes with green LED lights in the sole, tied up with laces and a buckle.","Size","US 8","","","","","123456789012","upc","","","","","356","g","",""
"led-high-tops","LED High Tops","Convictional Apparel","Apparel","men","led-high-tops-US 9","","4","41","https://cdn.shopify.com/s/files/1/0018/5617/6150/products/putting-on-your-shoes_925x_f71c19ac-c091-4c7f-bbfe-a43d6a0456b7.jpg?v=1545334662","Black high top shoes with green LED lights in the sole, tied up with laces and a buckle.","Size","US 9","","","","","123456789029","upc","","","","","230","g","",""
...More Rows...
Upload it to your outbound directory on your SFTP server.
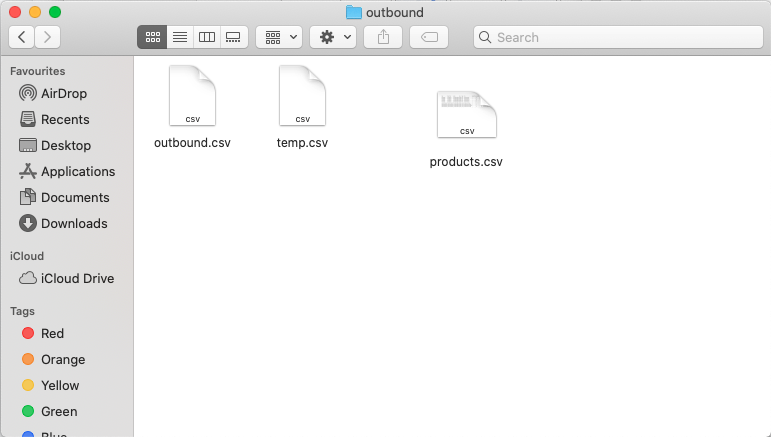
Using the “Upload Product File” card, we will confirm Convictional is able to locate and access this file.
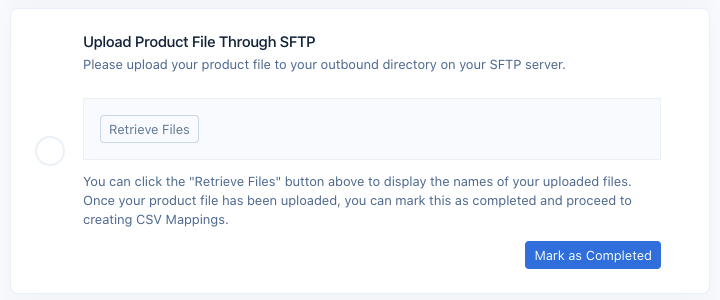
Once the file is placed, click “Retrieve Files”.
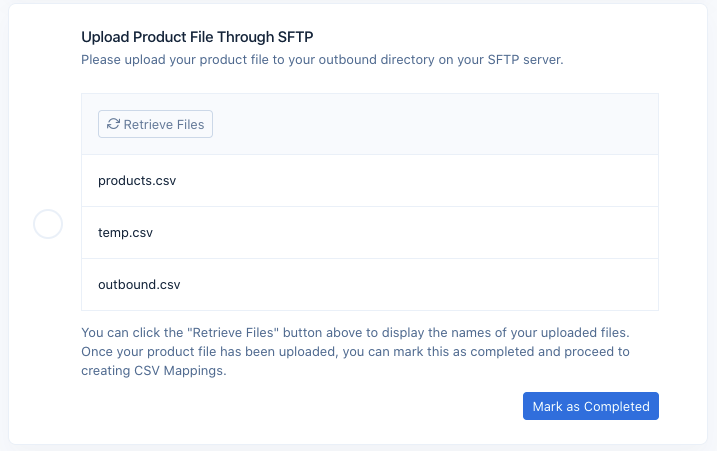
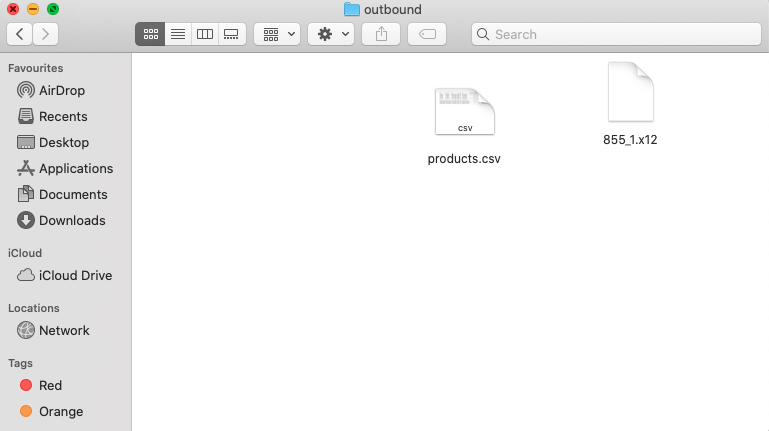
You should see your products.csv file. Once you do, click “Mark as Completed”.
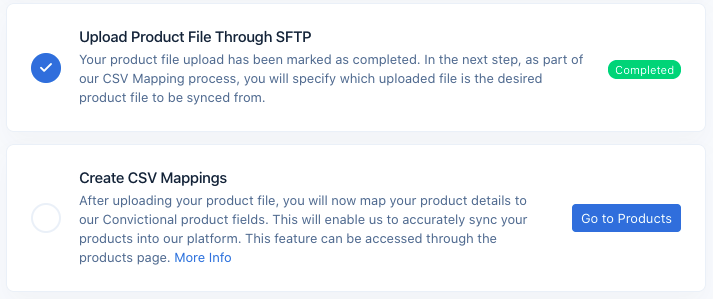
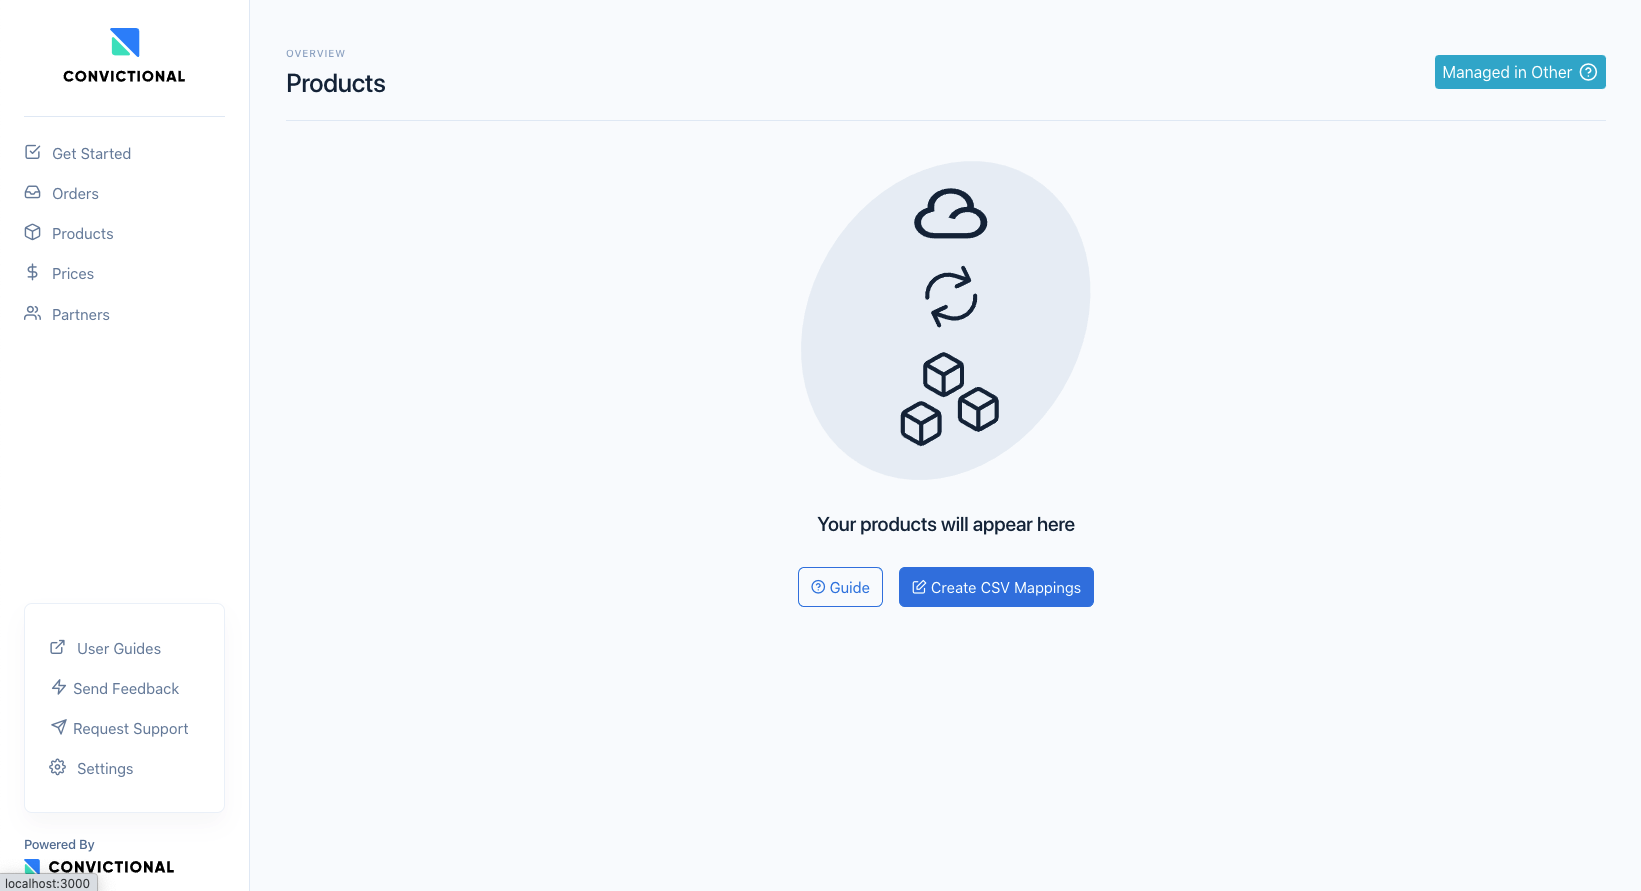
Next, we will begin to set up a mapping from the CSV column to the Convictional product model. Click “Go to Product”, then select “Create CSV Mappings”.
You will be prompted to fill in three fields. You need to indicate which file is the products file, and the type of delimiter. Again, since inventory updates will go through EDI.
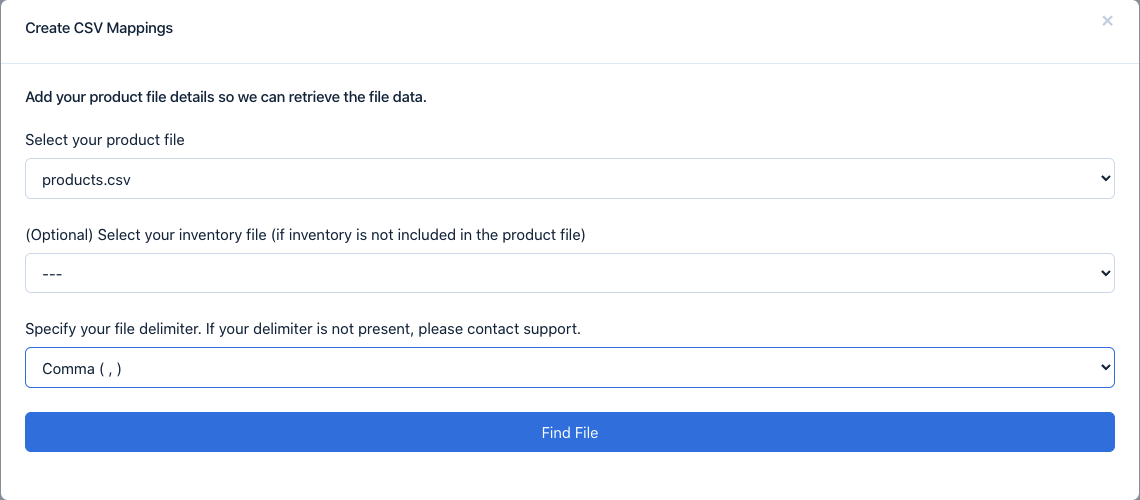
Hit “Find File”.
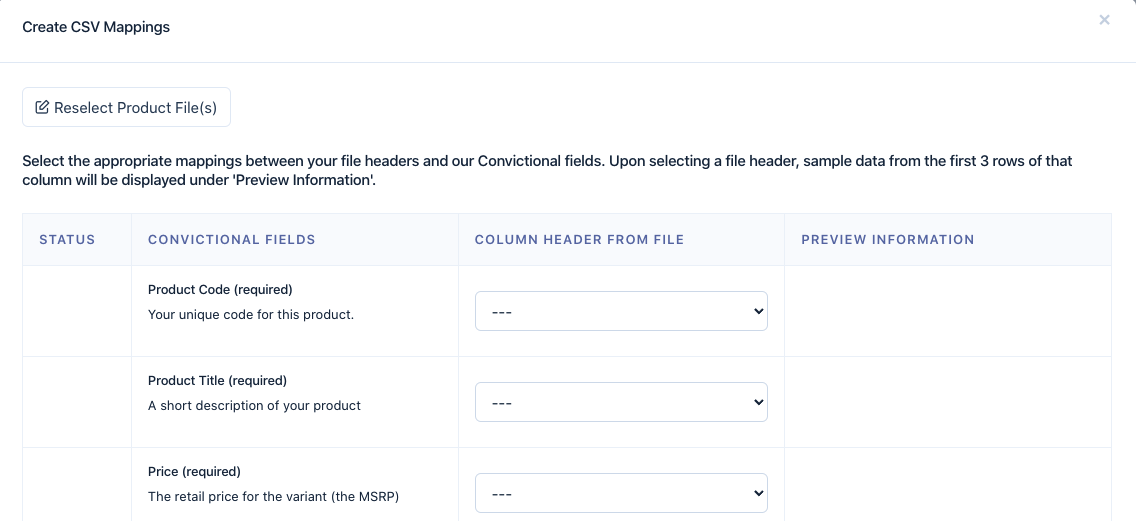
We will need to decide on what data maps into the Convictional model. Go through each field and map it to a column in your products.csv. If you are using the template, it should be fairly straightforward. Vendor Code must be set to barcode.
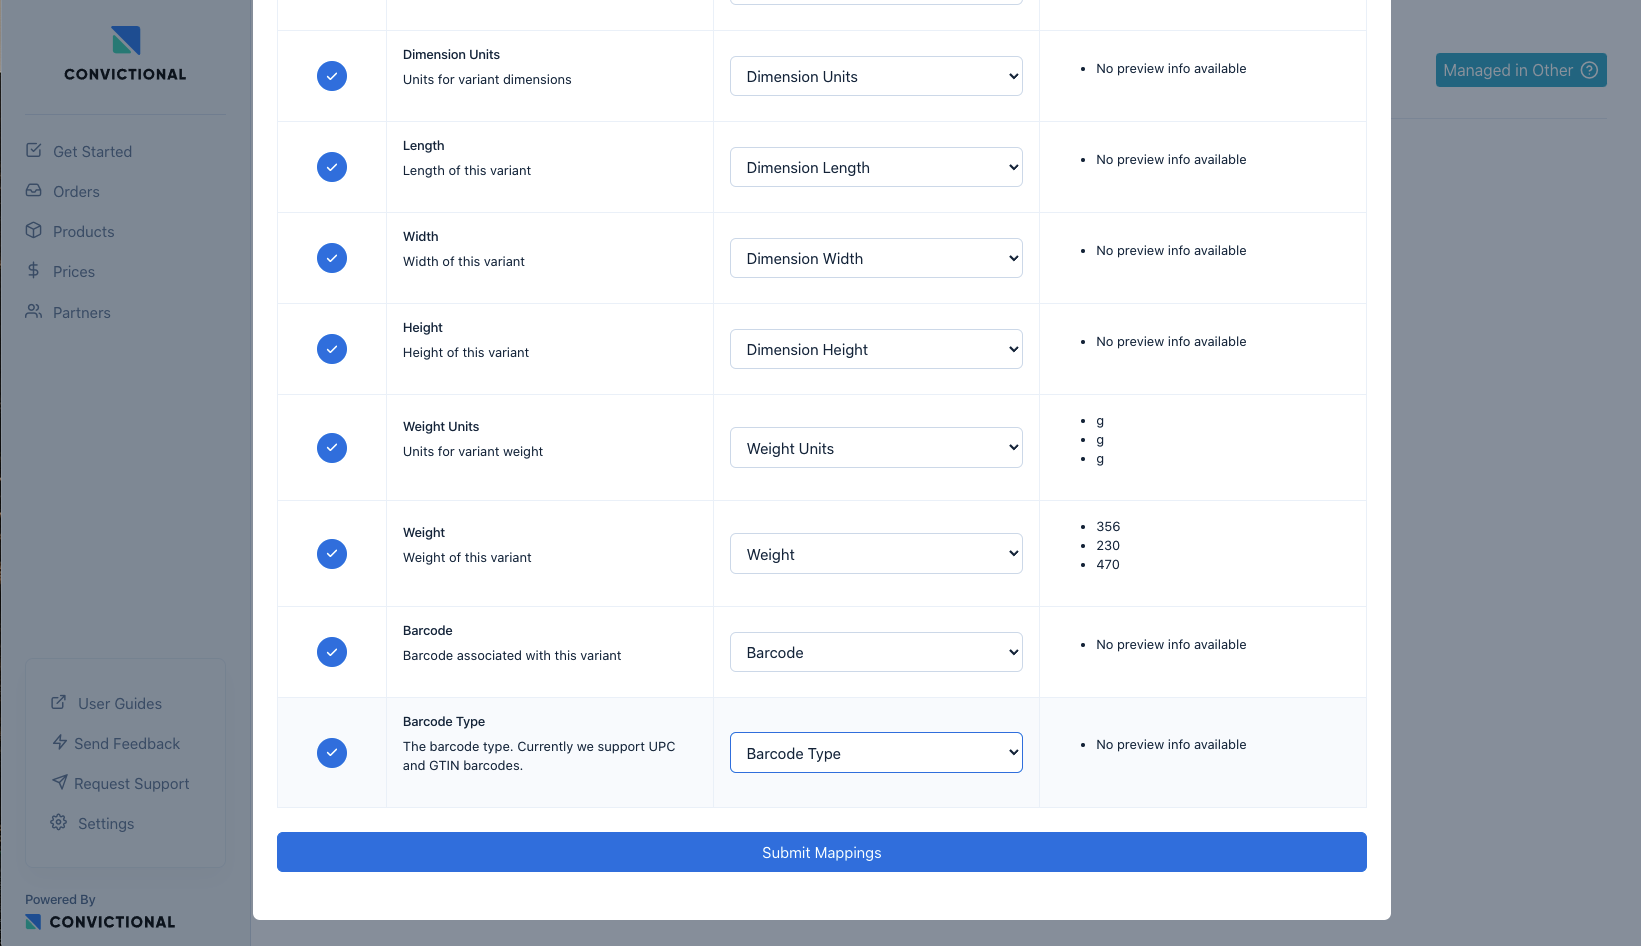
Click “Submit Mappings” when completed.

Since we are dealing with batch systems, it can take up to 2 hours to sync your products. It’s safe to check in an hour.
You will be aware that the products are synced if you return the products page and see the list of products.
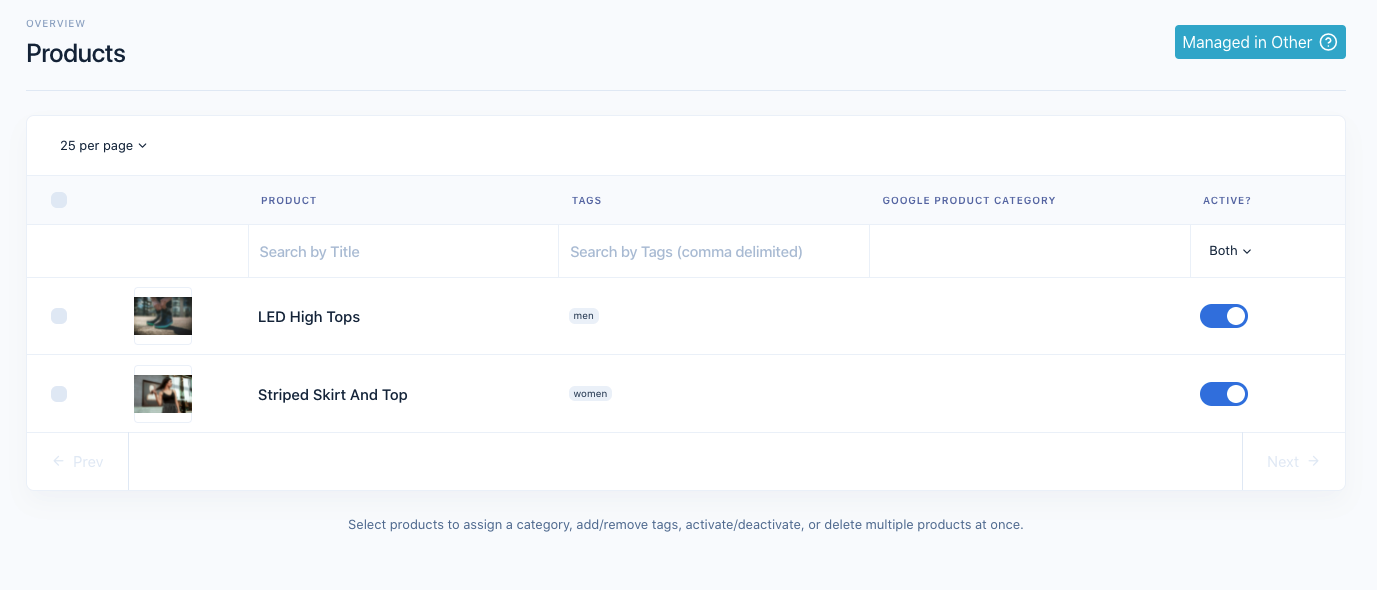
As you can see the two products in the sample products.csv have been uploaded and created in Convictional. The active toggle means these products will be available to partners if they are priced (Step 7). You can click on any product row to view more details.
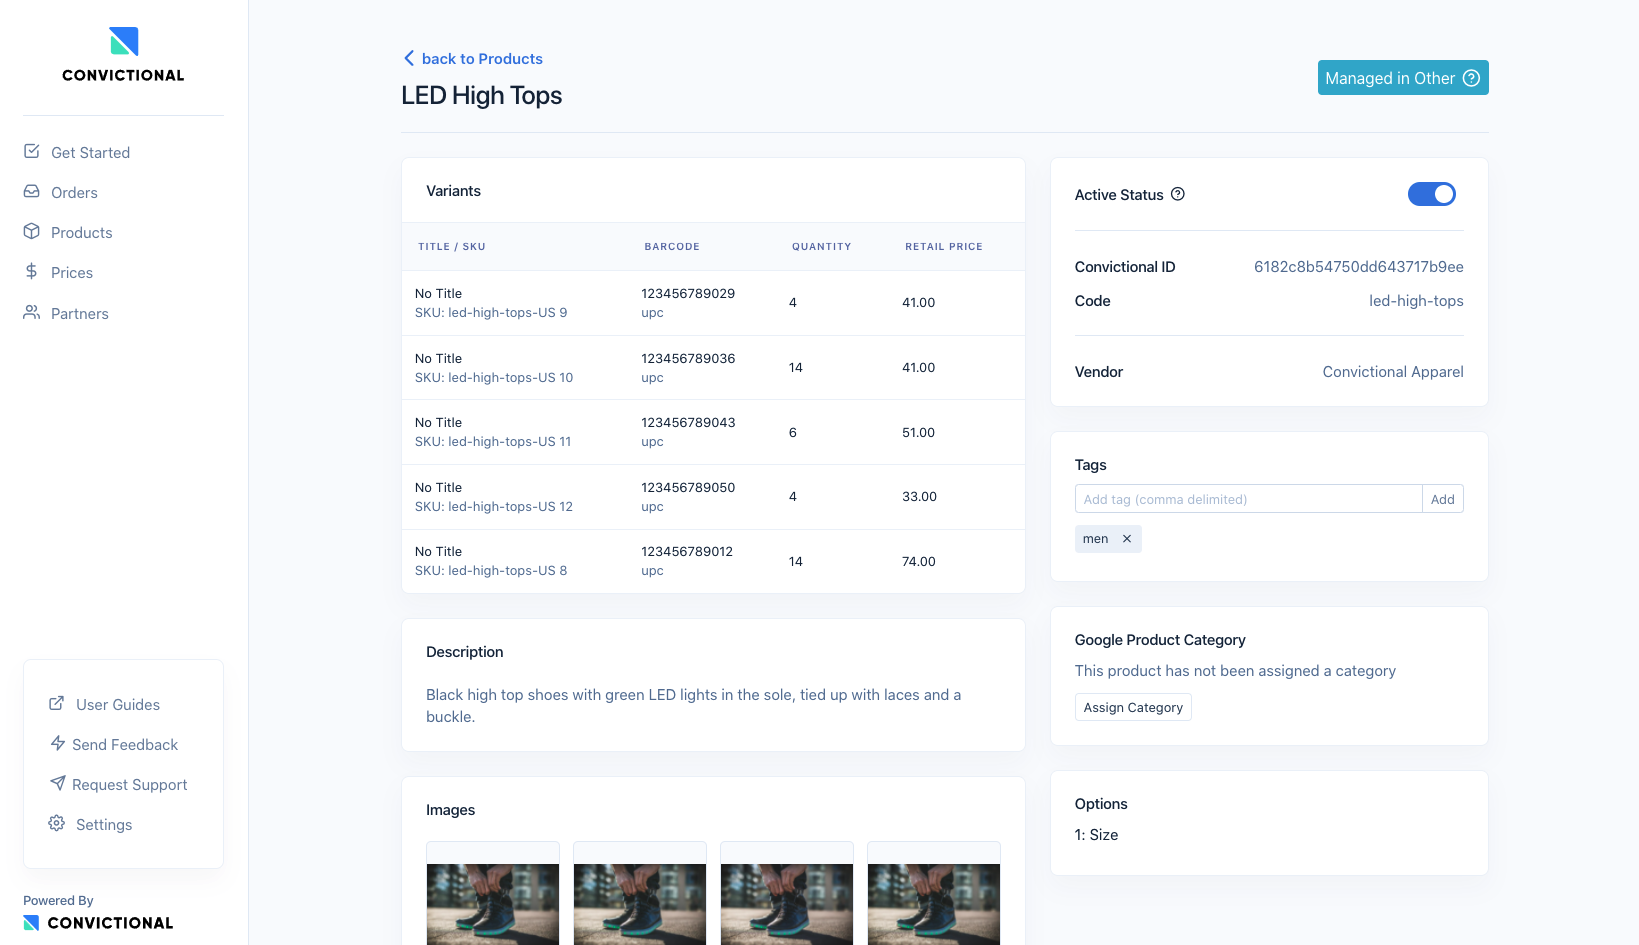
Everything is set up for your product information!
Step 4: Connect your Payment Gateway
You can read about setting up your payment gateway here or select 'Manual Billing' if using the Invoice (810) document.

Step 5: Configure EDI
It’s now time to review Convictional's EDI specifications. We will go through the full EDI specification of each document.
Each transaction set maps to a Convictional model for the most part (see table).
Transaction Set Number | Convictional Model |
Inventory Update (846) | Variant (Child of product) |
Purchase Order (850) | Order |
Purchase Order Acknowledgement (855) | PO Acknowledgements do not map to any Convictional model. |
Advance Ship Notice (856) | Fulfillments (Child of orders) |
Invoices (810) | Invoices |
What is a mapping?
The purpose of building a mapping for each document is each company has a different set of required and optional pieces of information. We are building a translation between an EDI document and the Convictional model. This Convictional model will then be translated or ingested by your trading partner through another integration.
There are four types of fields to map to:
- Convictional Defined Field
- Attribute
- Metafield
- Constant
Each type has it's own purpose and it's your decision on how they are used. Convictional defined fields are core to our product. These would be more common fields such as barcode, SKU, retail price, quantity, etc. Attributes are fields that are written by you and are readable by your trading partner. These are all fields that are important to your trading partner but do not fall within Convictional core models. Metafields is information that is uniquely for you and not visible to any of your partners. A common use case for metafields in EDI is data elements that are used for debugging. Constant is a data element that should not change.
What ISA ID do I put?
In production, you should be using your partner's ISA ID for the receiver when sending files to Convictional. If your partner can not provide you with this, please contact support.
During testing, you should use the identifier for the Convictional test buyer:
- Qualifier: 01
- Identifier: 117522184
Setting up your ISA ID in Convictional
There are two ways to set up your ISA ID.
In the Get Started page, there is a section to configure your EDI settings.
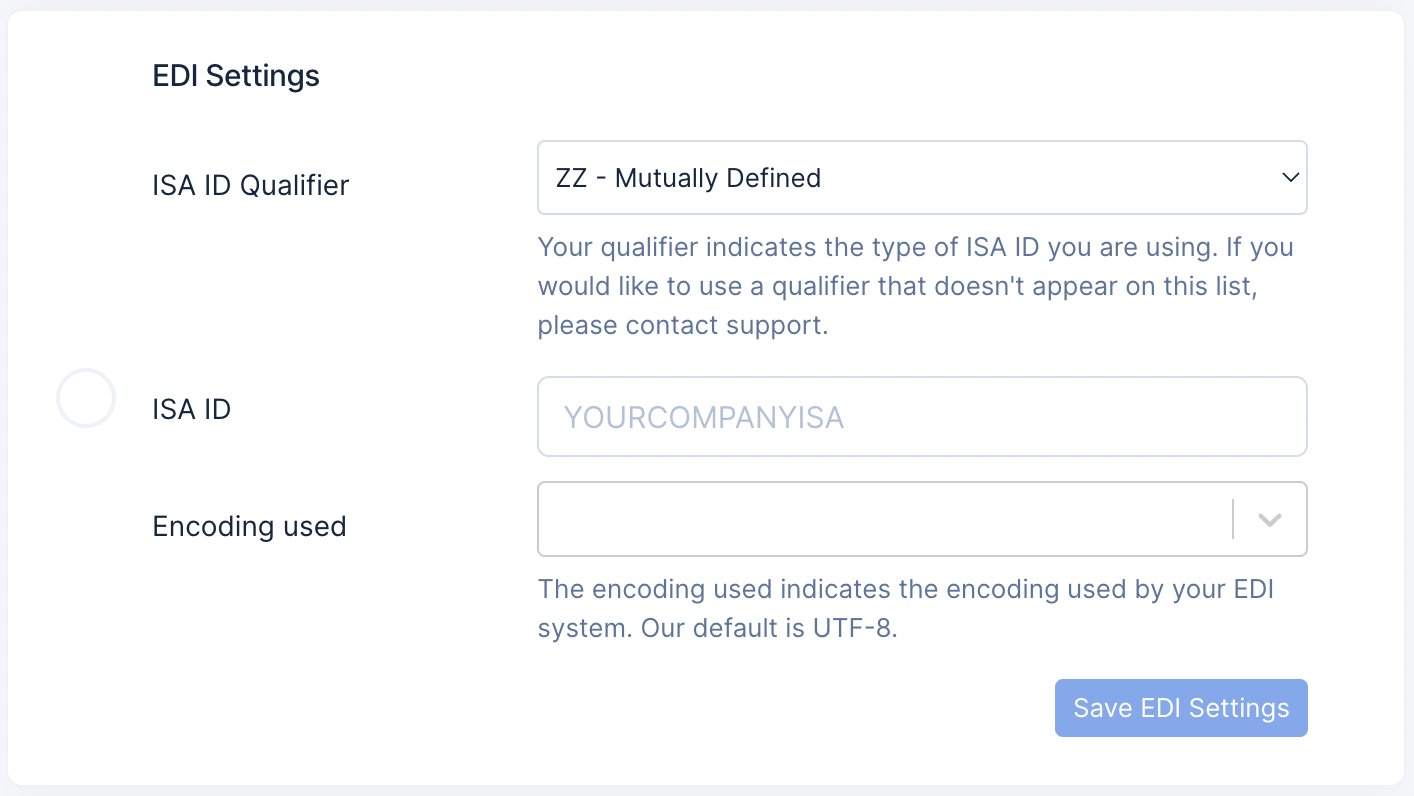
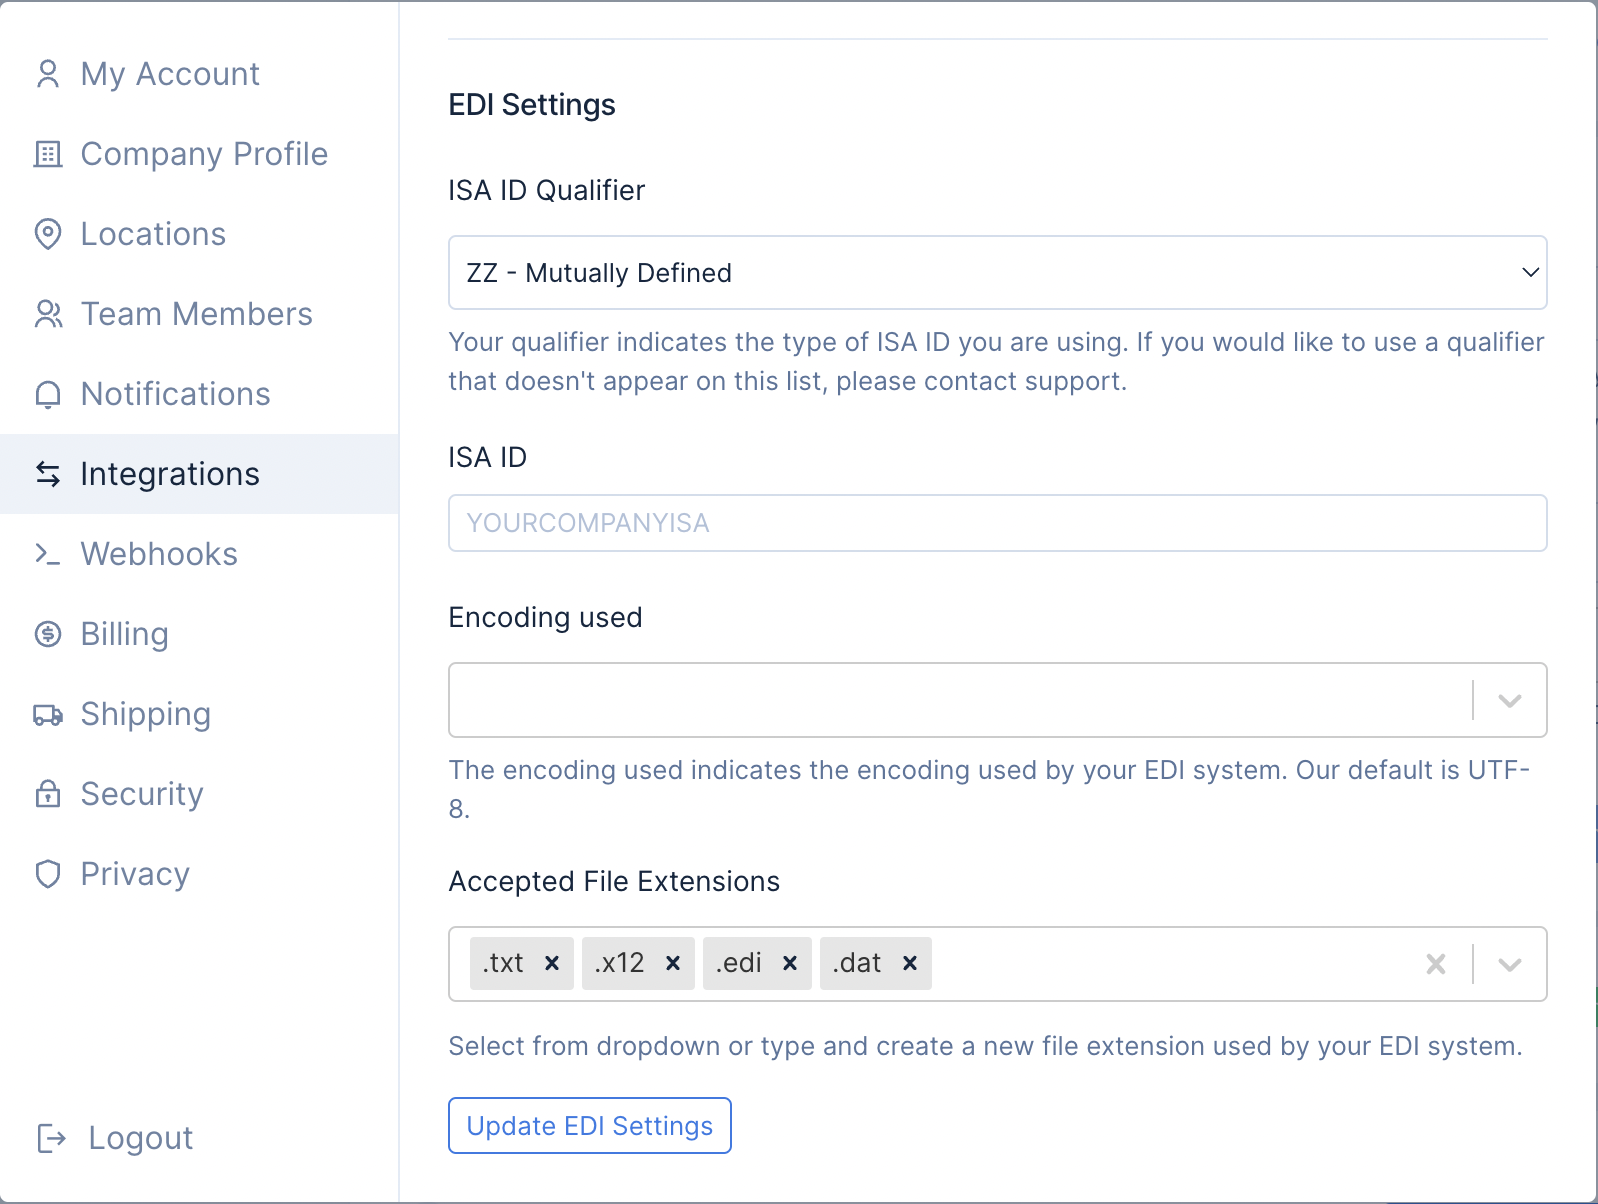
If you later want to update your EDI settings, you can do so by opening settings in the bottom left corner of your window in the Convictional app. Navigate to the Integrations tab of settings. Under the “EDI Settings”, you will see a place to enter your ISA ID, and the your ISA ID qualifier.
Can I have multiple transaction sets per document?
We do not support multiple transaction sets per document. Our system should operate in near real-time and batching transactions is not required. If Convictional receives an EDI document with multiple transactions, it will create a Trade Ops Issue.
Inventory Update (846)
Here is a sample file:
ISA*00*          *00*          *ZZ*YOURISAID12345 *01*117522184      *210629*1827*U*00401*000000001*1*P*>~
GS*IB*YOURISAID12345*117522184*20210629*1827*99*X*004010~
ST*846*0001~
BIA*00*MB*00001*20211117~
LIN*1*UP*123456789029~
QTY*33*1*EA~
LIN*2*UP*123456789036~
QTY*33*2*EA~
LIN*3*UP*123456789043~
QTY*33*3*EA~
LIN*4*UP*123456789050~
QTY*33*4*EA~
LIN*5*UP*123456789012~
QTY*33*5*EA~
LIN*6*UP*123456789067~
QTY*33*101*EA~
LIN*7*UP*123456789074~
QTY*33*102*EA~
LIN*8*UP*123456789081~
QTY*33*103*EA~
CTT*8~
SE*20*0001~
GE*1*99~
IEA*1*000000001~
We are going to walk through the different parts of the Inventory Update (846) transaction set to understand how it works with our system.
ST & SE
ST and SE segments are fairly straightforward. The ST-01 should indicate the 846 transaction set number. The ST-02 should be an identifier. As mentioned, Convictional only accepts one transaction set per file, so “0001” can actually be a constant.
BIA
For the BIA segment, we begin to indicate expected business logic. For Transaction Set Purpose Code (BIA-01), we accept “00” or “04”. “00” stands for original. In plain English, we expect you to provide all variant inventory numbers in each Inventory Update (846) update. If a variant is missing, the inventory for that variant will be set to 0. If the Transaction Set Purpose code is “04” which stands for “Change”. We do not zero out the variants that were not provided.
For the Report Type Code (BIA-02), we accept only one value “MB”. This stands for “Manufacturer Distributor Inventory”.
For the Reference Identification (BIA-03), we accept any alphanumeric value between 1 and 30 characters. This value should be unique compared to other Inventory Updates (846) you provide. However, we don’t actually use this value for anything other than debugging.
For the Date (BIA-04) and Time (BIA-05), we require these values. We will only sync inventory updates that are newer. This helps avoid old data updating our systems.Ex. We created 846_1.txt on 2021-11-03 at 2:00 pm UTC. We created 846_2.txt on 2021-11-03 at 2:05 pm UTC. We receive 846_2.txt, and make updates. We do not want 846_1.txt overwriting this information. We simply save the EDI file, and discard the file.
Convictional servers are set to UTC as their timezone. We prefer any data to reflect UTC, but you can customise your timezone. Follow this guide here.
LIN
The LIN and QTY segments loop through each of the variants.
For the LIN segment, we have three data elements. The first is the assigned identifier (LIN-01). This value is used only for debugging, should be unique and is typically a counter. The next element is the Product ID Qualifier (LIN-02). We accept two values: UP, EN. When the quantifier is a UPC (“UP”) or European Article Number (“EN”), we map this directly to our barcode type field on the variant model.
For the QTY segment, we accept “33” as the quantity qualifier (QTY-01). “33” represents Quantity Available for Sale (Stock quantity). We expect the current inventory amount in QTY-02. This value should not be a negative number. Unit of measure can only be each (“EA”).
If you do not want a product available to a partner, either mark it as inactive, or remove it from your price list. Your price list can be updated through Convictional UI.
CTT
For CTT-01, it represents the number of line items (LIN and QTY loop iterations).
Purchase Order (850)
Next, you are looking for Convictional to send Purchase Orders (850) to your system. You are able to define the type of information you want and it’s derived from our Order model. At the bottom of the Purchase Order (850) specification, you can find a sample 850 file. Here it is:
ISA*00*          *00*          *01*117522184      *ZZ*YOURISAID12345 *210517*1900*U*00401*000000004*1*P*>~
GS*PO*117522184*YOURISAID12345*20210517*1900*1*X*00401~
ST*850*0001~
BEG*00*NE*4**20210517~
N1*ST*John Smith~
N3*123 Fake St*Apt 1~
N4*Waterloo*ON*L6M5A9*CA~
N1*BT*John Smith****~
N3*123 Fake St*Apt 1~
N4*Waterloo*ON*L6M5A9*CA~
PO1*1*2*EA*64.35*PE*UP*012345678905*SKU*SAMPLE-SKU*VP*SAMPLE-SKU~
PID*F****Product Title 1~
CTT*1~
SE*12*0001~
GE*1*1~
IEA*1*000000004~
This will be the type of file sent to you. We will briefly go through the different parts of the Purchase Order (850)
ST & SE
Similar to the 846 setup, ST and SE segments should be “850” and “0001”. The ST-01 should indicate the 850 transaction set number. The ST-02 should be an identifier.
BEG
The first segment after ST is the BEG segment. For the Transaction Set Purpose Code (BEG-01), we tend to send “00” which is original. For Purchase Order Type Code (“BEG-02”), we only send “NE” which stands for New Order. The BEG-03 contains the seller order reference. This value is populated by the Convictional system. We use a simple counter that increments with each order and keeps this value unique. Release number (BEG-04) is an optional field. We will not set it, but if required, you either make it a constant or ask the buyer to provide it within an attribute. Purchase Order Date (BEG-05) is provided and we use the date when the order is submitted into Convictional.
N1
In the sample file, we are passing both the Shipping Address (ST) and Billing Address (BT) segments. For best practices, they should be fully independent segments. We require name, address (one), city, state, and zip code when creating a new order. All of these values will be in the order.
PO1
Baseline item data represent each line item. In the sample provided, we indicate quantity (PO1-02), retail price (PO1-04), then identify the variant purchase. We require barcode (PO1-07) and barcode type (PO1-06) to identify this variant
CTT
The CTT segment is a check to confirm the number of line items provided.
Purchase Order Acknowledgement (855)
Below is a sample of a purchase order acknowledgement. After we send you a Purchase Order (850), we expect a Purchase Order Acknowledgement (855) in return.
ISA*00*          *00*          *ZZ*YOURISAID12345 *01*117522184      *210629*1827*U*00401*000000059*1*P*>~
GS*IB*YOURISAID12345*117522184*20210629*1827*99*X*004010~
ST*855*0001~
BAK*00*AD*2*20210423~
PO1*1*****UP*123456789036~
ACK*IA*2*EA~
CTT*1~
SE*6*0001~
GE*1*99~
IEA*1*000000059~
ST & SE
See other transaction sets for a description.
BAK
The beginning of the purchase order acknowledgement (BAK) segment provides us with information to relate back to the original purchase order. The transaction set purpose code (BAK-01) must be original (“00”). For the Acknowledgement Type (BAK-02), Convictional accepts three types: Accepted (“AD”), Accepted with Changes (“AC”), or Rejected (“RD”). For the Purchase Order Code (BAK-03), this value should align with the seller order code sent in the Purchase Order (850). The seller order code can also be found on the specific orders page with Convictional.
PO1 & ACK
Baseline item data represent each line item. Similar to the Purchase Order (850), we need to acknowledge each line item. The PO1 and ACK segments are repeated together. The line item identifier and the variant references in the PO1 segment should be the exact same as the PO1 segment in the Purchase Order. The ACK is how we handle acknowledgements of each line item. The line items status code (ACK-01) will determine if the line item needs to be cancelled within the order. The quantity accepted (ACK-02) will allow us to understand how much should be cancelled.
CTT
The CTT segment is a check to confirm the number of line items with an acknowledged status.
Advance Ship Notice (856)
The Advance Ship Notice (ASN) is how you communicate order fulfillments to buyer's through Convictional. You will send us an ASN such as:
ISA*00*          *00*          *ZZ*YOURISAID12345 *01*117522184      *210629*1827*U*00401*000000059*1*P*>~
GS*IB*YOURISAID*117522184*20210629*1827*99*X*004010~
ST*856*0001~
BSN*00*0101779964*20210423*1545~
HL*1**S*~
TD5**2*CPC*M*Canada Post*******G2~
HL*2*1*O~
PRF*2~
HL*3*2*P~
MAN*CP*1234567~
HL*4*3*I~
LIN*1*UP*123456789036~
SN1**1*EA~
CTT*1~
SE*14*0001~
GE*1*38027~
IEA*1*000000059~
Let's go through each of the segments and understand how Convictional handles it.
ST & SE
Similar to other transaction sets.
BSN
The BSN segment represents the beginning of the Ship Notice. We expect an original copy, therefore, we are looking for Original ("00") in the Transaction Set Purpose Code (BSN-01). The shipment identification number can be determine by your system. The Convictional system doesn't use this number. It's be to write this field into attributes (If you want to share it with your trading partner) or metafields for debugging if required. The next two data elements again are not used by Convictional for anything in particular and can get written into metafields.
HL (S)
The herarchical loop expects incrementing ID numbers (HL-01). We require you to indicate the parent ID number (HL-02) expect for Shipment HL Loop. Finally, we require the Hierarchical Level Code (HL-03), and the ordering is Shipment, Order, Pack, and Item.
The first loop should be Shipment. Currently in the Convictional models, fulfillments are a child of an order. In this iteration, we capture shipping service information but nothing more.
TD5
The Carrier Details (TD5) segment is required. The Convictional EDI system uses SCAC codes for identifying Carriers. As indicated in the specification, we required TD5-02 to indicate this. The SCAC should be indicated in TD5-03 data element. The carrier name should be in TD5-05.
HL (O)
The next iteration of the hierarchical structure is for order information that relates back to the Purchase Order.
PRF
This segment contains the Purchase Order Number that was indicated in the BEG-03 data element within the Purchase Order (850). This value is also known as the Seller Order Code and can be found on a specific order page.
HL (P)
The next iteration of the hierarchical structure is the pack. This maps to our Fulfilment mode and we require details.
MAN
Within the MAN segment, we are expecting the tracking code (MAN-02) for the fulfilment.
DTM
We expected a shipped date. If the date isn't provided, we set this as the time the EDI file ingested into our system.
HL (I)
The next iteration of the hierarchical structure is for order line items.
LIN & SN1
The LIN and SN1 segments are how we identify each line item and the quantity shipped.
CTT
This returns the number of line items.
Invoice (810)
The Invoice (810) document is how you communicate order fulfillments to buyer's through Convictional. You will send us an invoice such as:
ISA*00* *00* *01*117522184 *ZZ*SAMPLEISAID *210423*2004*U*00401*000038030*0*P*}~
GS*IN*117522184*SAMPLEISAID*20210423*2004*38030*X*004010~
ST*810*0001~
BIG*20210423*9200543422**4541811000~
CUR*SE*CAD~
IT1*00010*1*EA*17.55**UP*028295461111***PO*4541811000~
IT1*00020*1*EA*22.75**UP*028295452222***PO*4541811000~
TDS*4634~
TXI*GS*3.04~
TXI*SP*3~
CTT*2~
SE*17*0001~
GE*5*38030~
IEA*1*000038030~
ST & SE
Similar to other transaction sets.
BIG
The BIG segment represents the beginning of the Invoice document. It starts with the date accepted in the format of YYYYMMDD followed by the invoice number in BIG-02. We will not set BIG-03 and BIG-04 contains the Purchase Order Number set in BEG-03 of the Purchase Order (850)
CUR
Within the CUR segment, CUR-01 should be set to SE to indicate Selling Party and CUR-02 set to the invoice currency. Eg, CAD, USD.
IT1
The IT1 segment represents a Convictional order item that's being invoiced. We require the following values: assigned identification, quantity being invoiced, unit of measurement (only EA accepted), unit price, product ID qualifier (one of UP, EN, OT), and product ID.
TDS
The TDS segment represents the post-tax invoice total. This value should be in cents.
TXI
The TXI segment represents tax. TXI-01 accepts 2 values, GS for goods and services tax or SP for State/Provincial tax. TXI-02 contains the tax amount.
CTT
This returns the number of line items.
Step 6: Setup Price List
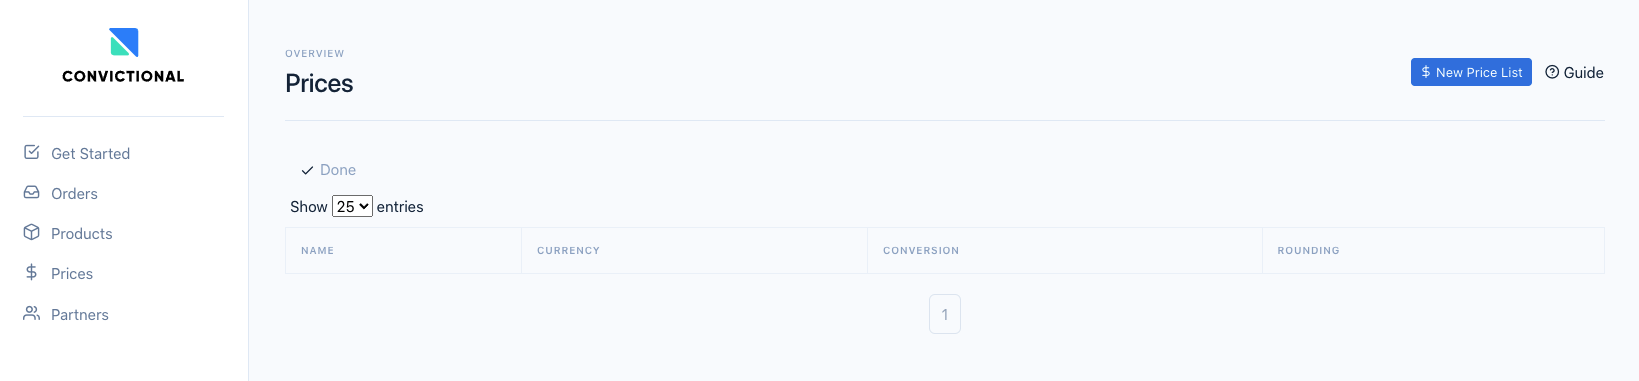
We will be setting up a price list through the Convictional app. Navigate to the Prices page.

On the top left corner, you should see "New Price List".
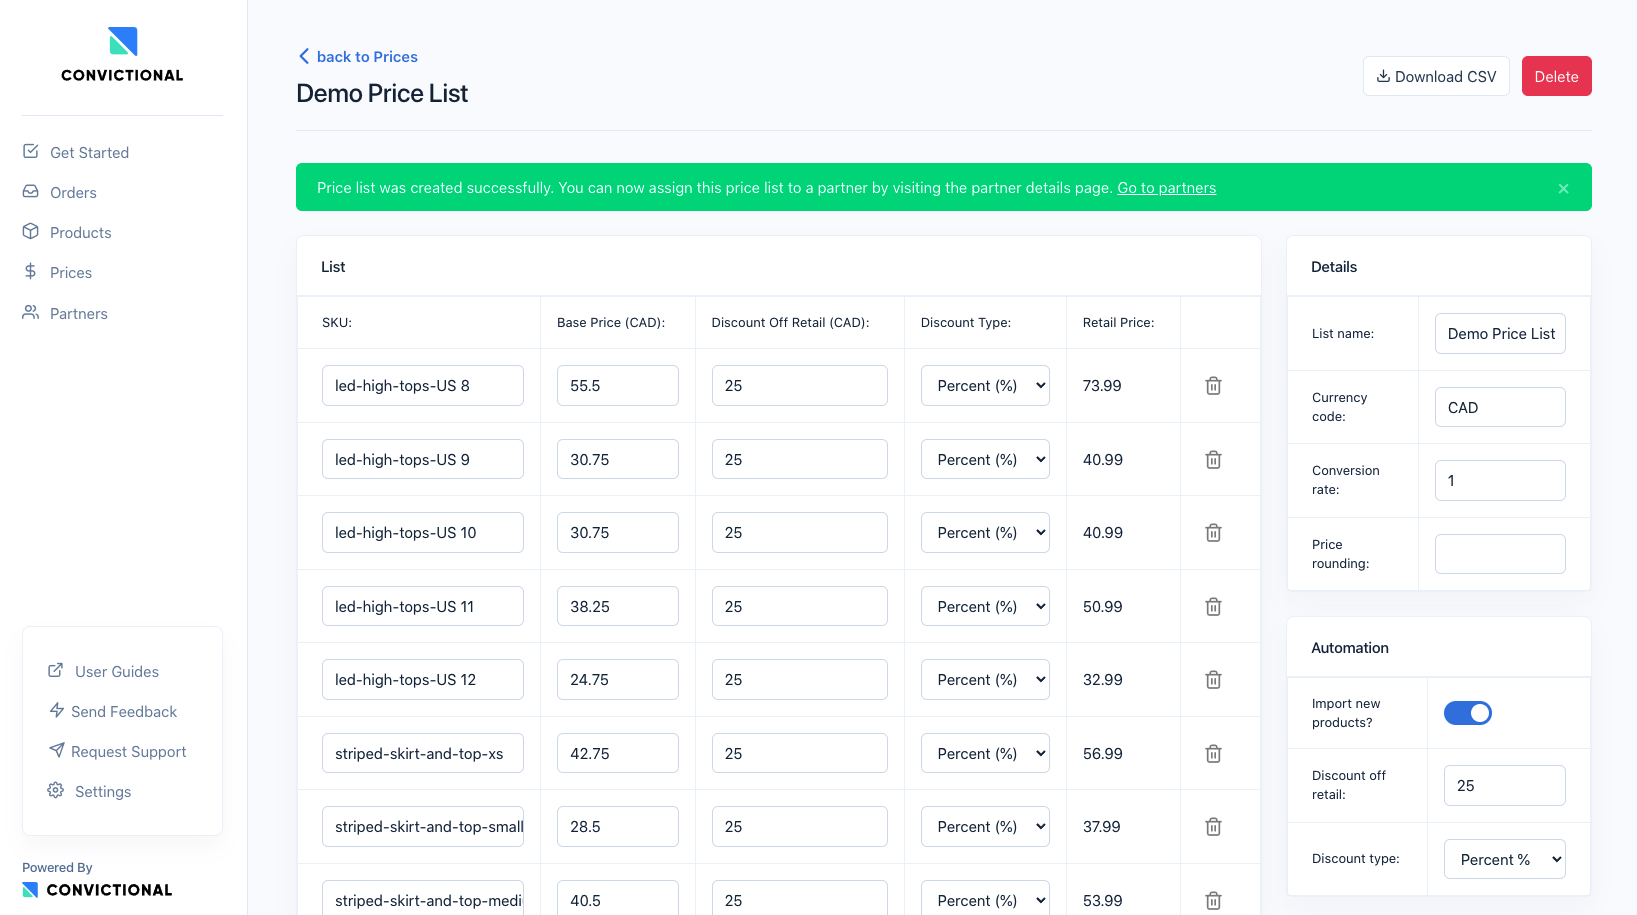
You will need to work through creating a price list. A full guide can be found here. Below are the answers to questions asked:
- List Name: Demo Price List
- Would you like to use our Price List Builder? Yes
- In which currency would you like buyers of this list to pay you? CAD
- In which currency will buyers resell products they purchase from this list? CAD
- What Margin would you like to offer buyers of this list? 25%
We kept it simple for this guide, and priced all products at 25%. This price list will only be used for a test account (right now). It can always be updated before you invite new partners.
Step 7: Testing
We are going to test the full order flow by setting up a partnership with Convictional's test buyer account.
First, we want to verify that you can update your inventory through 846s. You should already have products synced from Step 3: Upload Products. We will upload an Inventory Update (846) to ensure correct processing of your 846s. In the sample file, I change the inventory relative to the variants on the page. As well, in my sample file, we are not providing one UPC. It should be zero'd out.
Place an Inventory Update document in your outbound directory on the SFTP server.

It will take up to 15 minutes, but your sample file should now be picked up. If you encounter any issues, the TradeOps Issue page will list them.
Check your products page, and confirm the inventory updated as expected. You should be able to verify it both your seller and buyer account. Navigate to each product page.

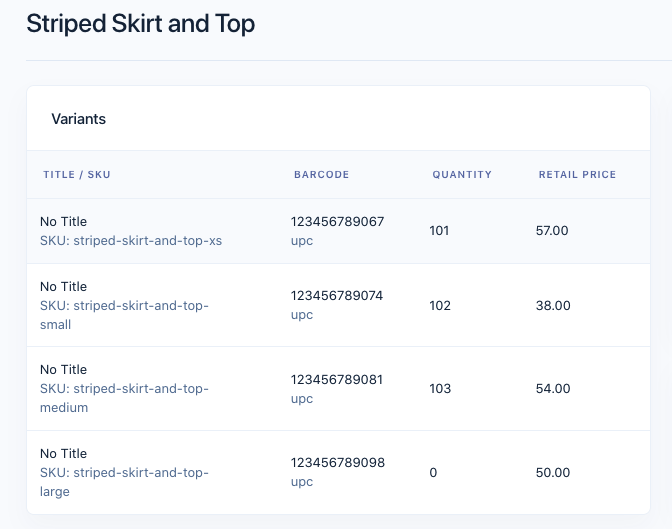
The final variant in the second image was expected to zero out. It's safe to say the Inventory Update (846) works as expected.
Next, we will test the order flow. In the Get Started page, you will see a section for a Test Order
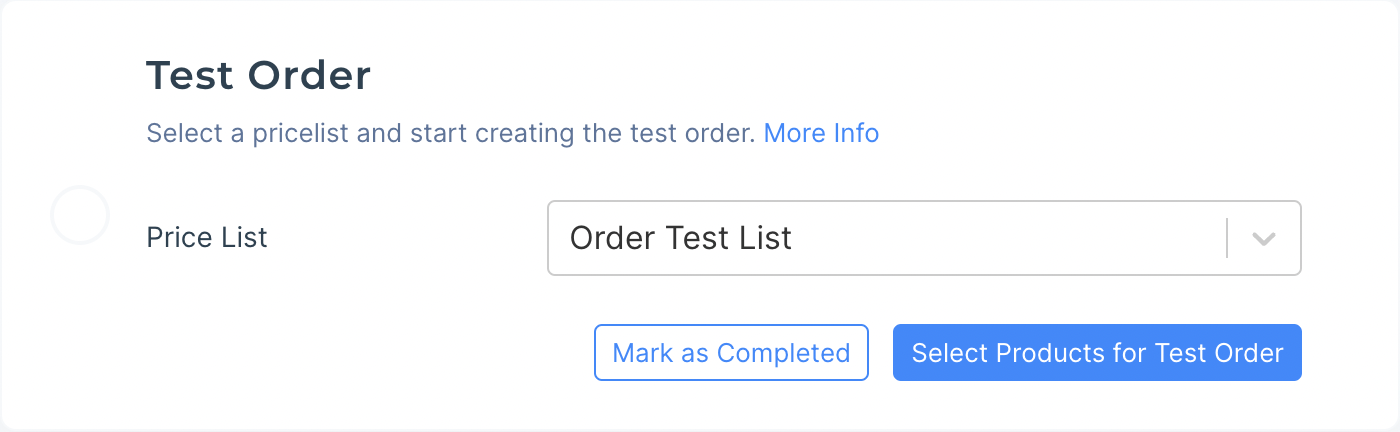
Click on 'Select Products for Test Order' to create your test order. More information can be found here.
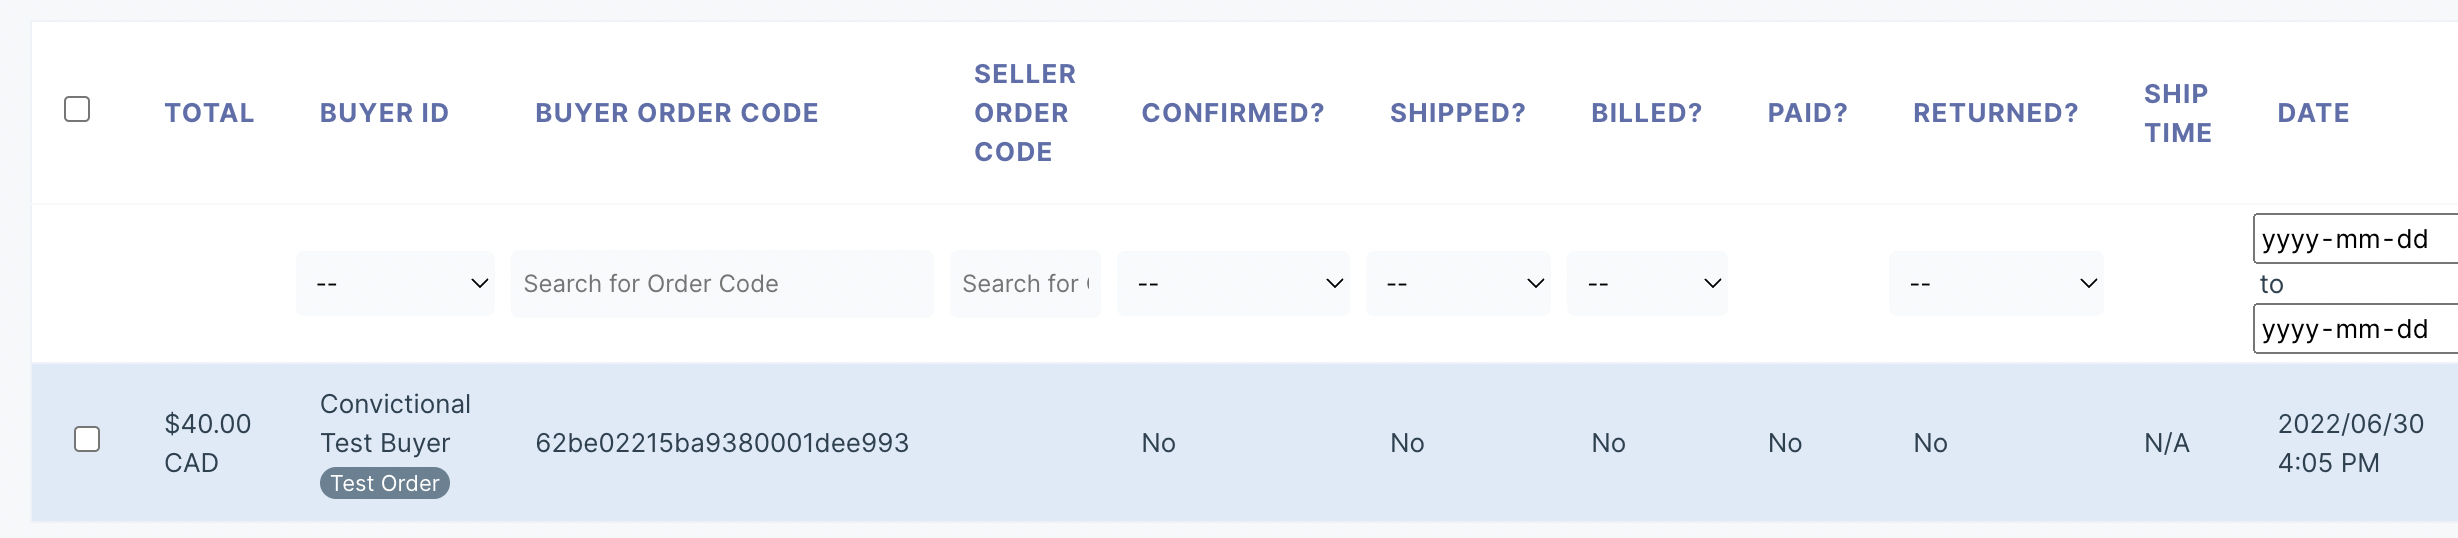
Now, navigate to the Orders page. You should see a new test order. Click on the order to see more order details.
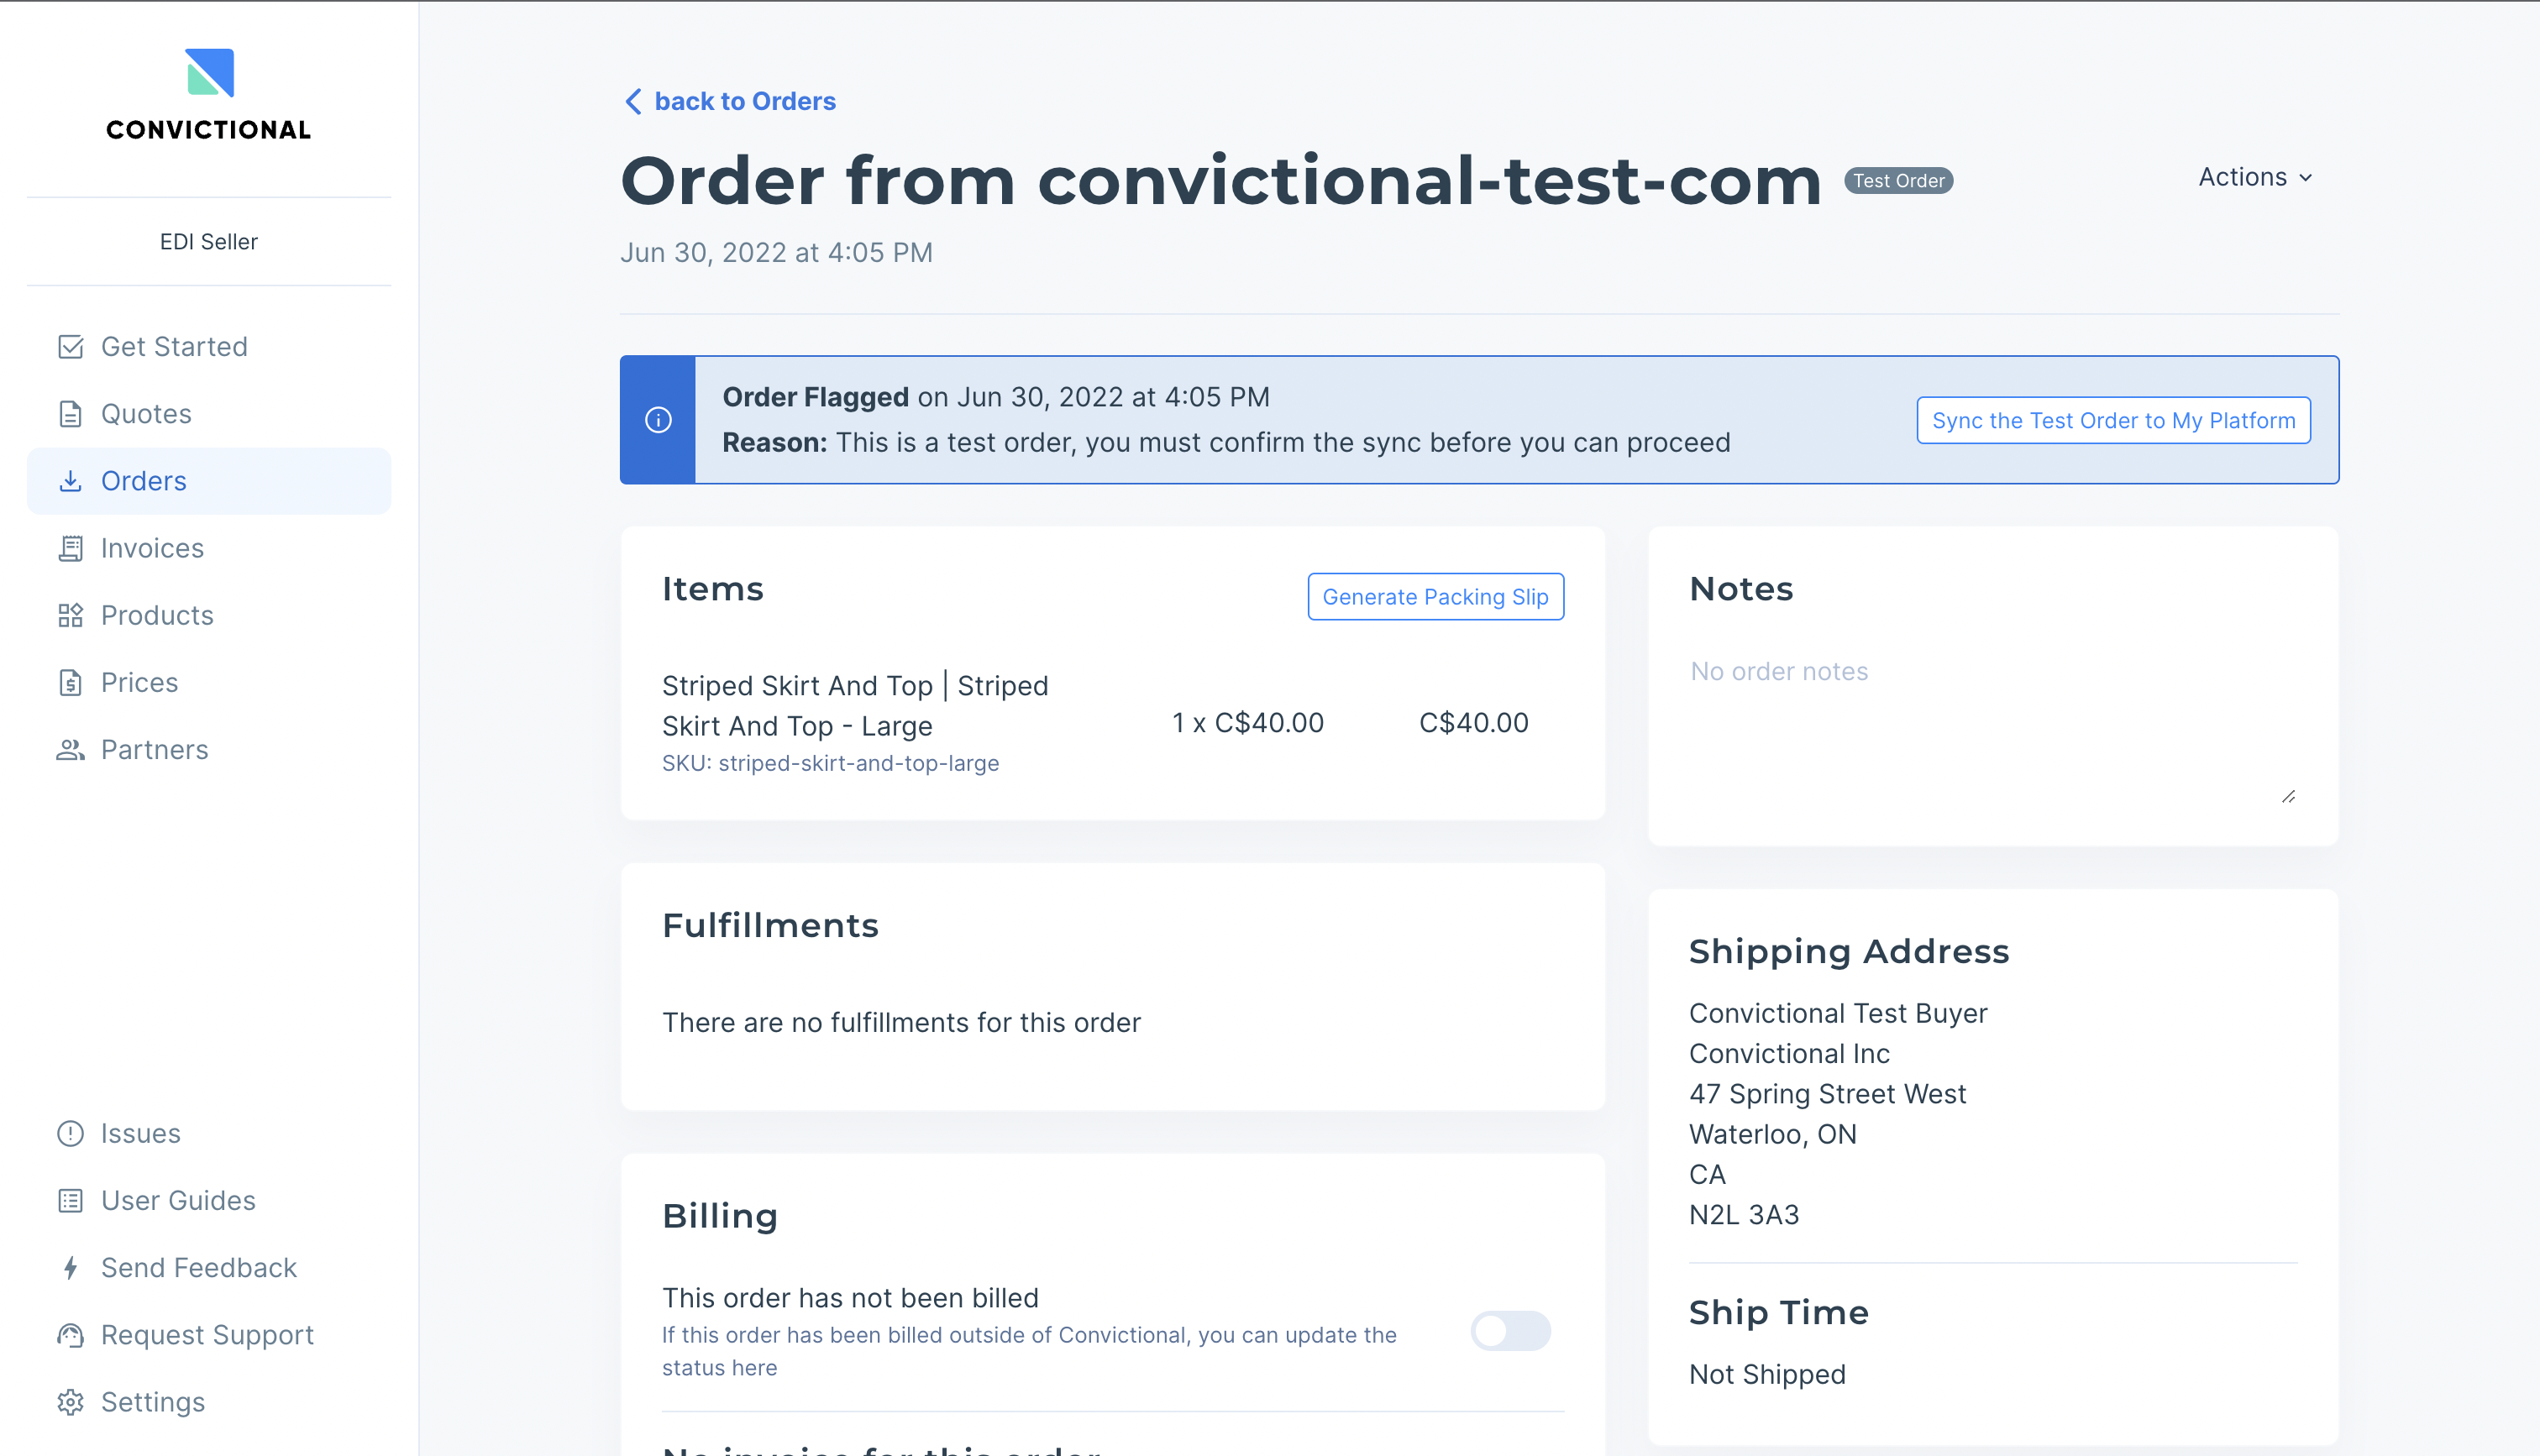
You will have to confirm the Test Order before Convictional will send you a Purchase Order (850). You can do so by clicking 'Sync the Test Order to My Platform'
In the next 15 minutes, a Purchase Order (850) will be sent to your inbound directory on the SFTP server.

If there are no issues with the Purchase Order (850), then it is time to upload the Purchase Order Acknowledgement (855) to the outbound directory. For this guide, we will manually update and place the file. It's preferred if your system automatically produces all EDI documents.
We need to update these items for the sample file:
- Seller Order code in BAK-03
- Transaction set date in BAK-04
- Line item identifier in PO1-01
- Barcode in PO1-01
- Quantity in ACK-02
Sample Purchase Order Acknowledgement (855) document:
ISA*00*          *00*          *ZZ*YOURISAID12345 *01*117522184      *210629*1827*U*00401*000000059*1*P*>~
GS*IB*YOURISAID12345*117522184*20211117*1827*99*X*004010~
ST*855*0001~
BAK*00*AD*1*20211117~
PO1*1*****UP*123456789012~
ACK*IA*2*EA~
CTT*1~
SE*6*0001~
GE*1*99~
IEA*1*000000059~
It should be placed in the outbound directory.
It will take about 15 - 30 minutes for the file to be picked up. If line items or the order were rejected, then they should be marked as cancelled within Convictional.
Next, we need to test out the fulfilment of the order. We will update the sample Advance Ship Notice. Changes:
- Update the ISA control number (855 had 59)
- Seller order code in PRF-01
- Barcode in LIN-03
- Quantity in SN1-02
The sample file is:
ISA*00*          *00*          *ZZ*YOURISAID12345 *01*117522184      *210629*1827*U*00401*000000060*1*P*>~
GS*IB*YOURISAID*117522184*20210629*1827*99*X*004010~
ST*856*0001~
BSN*00*0101779964*20210423*1545~
HL*1**S*~
TD5**2*CPC**Canada Post~
HL*2*1*O~
PRF*1~
HL*3*2*P~
MAN*CP*1234567~
HL*4*3*I~
LIN*1*UP*123456789012~
SN1**2*EA~
CTT*1~
SE*14*0001~
GE*1*38027~
IEA*1*000000060~
Place the Advance Ship Notice in your outbound directory.
In the next 15-30 minutes, it should be processed. Once it has successfully been processed, you should see the fulfilment on your orders page.
Once you've confirmed everything in the order flow is working, navigate back to Get Started Test Order section and mark it as complete!
Step 8: Trade!
Next, invite your partners to trade with you! You are all setup to receive orders through EDI.
Thanks for reading!